When will my order ship? How long do I have to wait before my order ships? Can I still order a new Model F or beam spring keyboard from the current stock and have it arrive soon?
Yes, there is still time now to join in this month on the project and get a keyboard from the current stock, as I have ordered extras. The shipping backlog is typically about a month or two for in stock items, sometimes longer. In other words, everyone has to wait in line for their order to ship; there is no way to have an order ship immediately. In terms of the timeline from here, I cannot estimate the timeline for any specific order, so please do not email me asking for a personalized update on when your order will ship. You will receive an email with a tracking number once your order is all done. All keyboard models are in stock, except for the second batch of F122 and all of the Round 2 beam spring keyboards (see below for details). The compact F50 and split ortho are out of stock with no current plans to make more, though you can still order one of the remaining the NOS IBM classic style F50 keyboards.
I have finished the Model M Style F104 and FSSK backlog for orders through the end of December 2024. All other stocked orders (including for Round 1 Beam Spring, F62/F77, compact F104/FSSK, and F15) should be going out when your turn comes up in the order queue.
March 2025 update: The first batch of F122 keyboards arrived this month; the second batch is planned to be completed this month and arrive to me in several months. Beam Spring keyboards were approved for mass production in December and are expected to be completed and delivered in 2025.
As always, please see the geekhack or DT forum thread for the latest updates (see the About page for the link) including production status. The updates on the forum threads are far more frequent and recent than the periodic updates posted several times per year on this blog page. Just because this post is dated from a while back does not mean there have been no updates!
All variations are available. The current discounted pricing is not guaranteed for the future and some keyboards have already started going up in price compared to the earlier discount as those keyboards are running out of stock, so I recommend joining the project this month and not waiting since you may be paying double or your favorite color or layout may no longer be available to order. If you are interested in skipping the line feel free to order the skip the line option mentioned below; otherwise you have to wait with everyone else in line! The project always has an order backlog, so please do not email me asking when your order will ship.
Read the manual fully before touching your keyboard, even if you have experience with these old style keyboards: After your new Model F keyboard arrives, I strongly recommend starting from the beginning of the setup video and the written manual, to minimize the time you need to figure things out. Do not only watch the hour-long setup video, as there have been many changes and other required steps not shown in the video. Since so many keyboards have shipped in a short timespan, there have been a higher-than-usual number of questions from folks, and almost all of the questioners show that they did not read the manual, and the solution to their issue is in the manual. Don’t be one of those people and spend hours more than you need to set things up! A fix for every potential Model F issue is described in the written manual. Part of the manual discusses an issue with transposed keys. The manual has been updated recently. The main thing to fix is removing and reinstalling the affected springs with the proper process described there and also shown in the hour-long setup video. Reports posted on the forums and messages sent to me indicate that this almost always fixes the issue. If that step does not fix the issue, the manual also notes the next steps in the diagnostic process.
Apologies that I have not gathered the recent forum updates every other month or so, as I have done in the past. Here are the latest updates since the previous comprehensive June 10th 2024 post. As a reminder, this does not mean that there were no updates. Updates are posted on the mechanical keyboard forum threads as soon as an update is available.
Major project milestones
This past month the 6,000th keyboard shipped! Six thousand! This includes both Brand New Model F and Brand New Beam Spring keyboards. They have shipped out to more than 65 countries around the world.
The biggest update from the past 6 months, however, is that the long-awaited Model M case style F104 and FSSK keyboards arrived and the long backlog has shipped out for everything up through the end of November 2024. Hundreds and hundreds of these new F104 and FSSK keyboards have shipped out all over the world. These keyboards were announced and orders started being accepted at the end of March 2023. If your order was placed for an in stock keyboard before December 2024 and has not shipped, please let me know (reminder: no one’s F122 or Round 2 beam spring keyboards have shipped yet, so please see the top of this post for the current order status for those keyboards).
Here are all the models that are now being offered
There is still time to order the original project’s F62/F77 and other keyboards, but they are on a “while supplies last” basis.
- Currently in stock: All F104 and FSSK, All F62 and F77, F15 Split Ergonomic, IBM NOS F50 macro pad (very limited quantity, see below for details)
- Currently completing assembly: the metal case classic Model M style F122 keyboards (expected to complete assembly in February or March)
- Currently in production and assembly: the Round 2 classic style Beam Spring keyboards (expected to complete assembly in several months, later this year)
- Currently out of stock: Model F Split Ortho, Ultra Compact F50, Classic Case style Beige F62
REQUEST: this week please share your photos, reviews, and postings on the Model F and Beam Spring Projects!
Please spend a few minutes this week to help the project: For those of you who have been using your Brand New Model F and Brand New Beam Spring keyboards, please do post a quick video on YouTube if you don’t mind! How do you like using your keyboard, how does it compare to your other keyboards, how was the setup experience, any recommendations and/or custom modifications, etc. A lot of folks find out about the project through YouTube nowadays. If you post a review please do set the title to something like “Brand New Model F Keyboards by Model F Labs review” or “Brand New Beam Spring Keyboards by Model F Labs review” – and let me know once you post as I want to share the various reviews, postings, and videos. Is there any feedback on the Model F ergo boards from folks who have been using them?
The reviews have started to come in
The Chyrosran22 review has been posted for the new Model M case style F104 Model F Keyboard!

Here is the new Chyrosran22 F104 unboxing video!
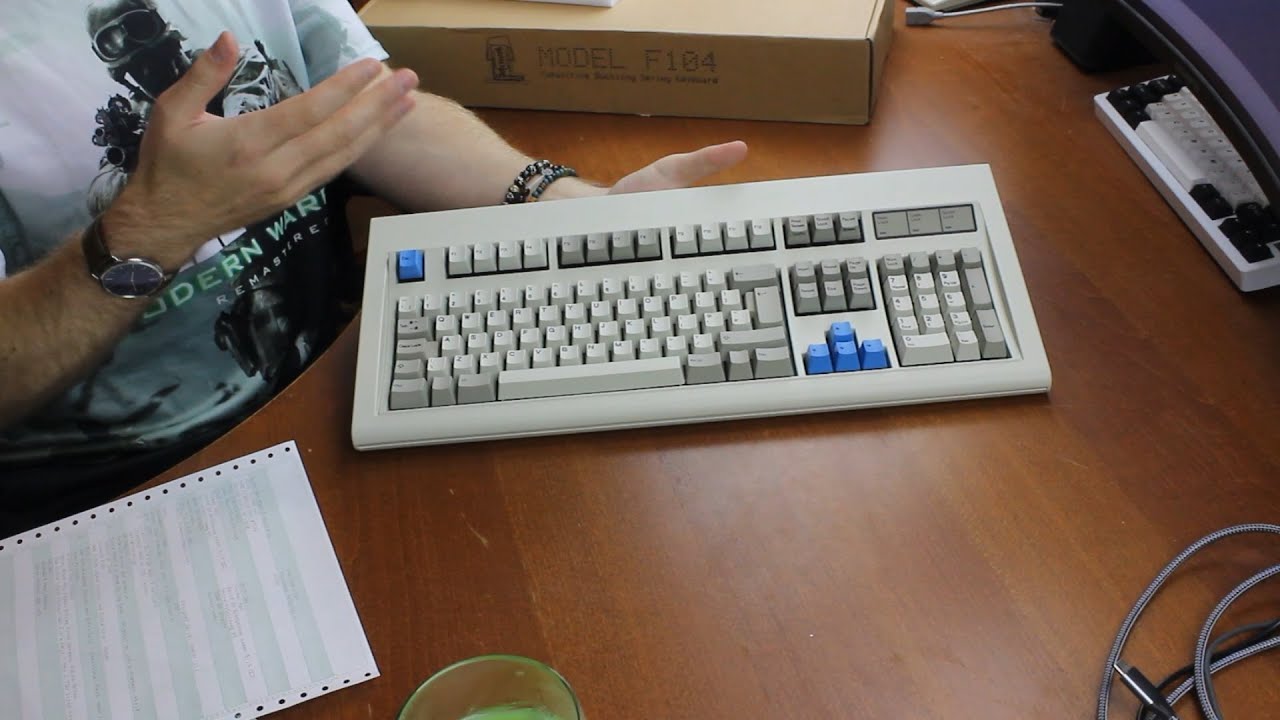
Chyrosran22 released the F104 trailer back in November. It is a wild video!

The new Model M case style F104 and FSSK keyboards started shipping in September, and we have seen some nice user reviews that have come in over the past few months. Everyone please do let me know how your setup experience went, and of course if anything broke in shipping please let me know so that it can be replaced. Additionally, for those outside the US and who received their new Model F keyboard through UPS, how was the delivery experience? Did the box and keyboard survive OK or did the box get roughed up in shipping? Also please do let me know if you are having any trouble. Please do not give up! If you follow the manual step by step everything should work. If you try to set it up on your own, you are almost guaranteed to have missed an important step and it will not likely work 100%; if you fall into this category please do start over and read the manual and watch the hour-long setup video so you become an expert on the Model F!
One such example from Deskthority forum member minimal:
Deskthority review and photo by forum member mbarszcz
F122 Update
The factory has taken much longer than expected to finish up assembly of the F122 keyboards. They are looking to finish up at the end of February or March due to their nearly one-month break for the new year, which starts in a couple weeks.
There were some mistakes made with the initial assembly and the boards were improperly assembled (always most likely on the first production run of any new keyboard over the past years of this project – it takes longer until the factory becomes experienced with a particular model and future orders can be faster), so they are in the process of disassembling, inspecting, and then reassembling the F122 plates, which are a little more difficult to open and close than the other keyboards’ plates, as anyone can attest who has an F122 from IBM.
Beam Spring Round 2 production update
The factory notes that they have completed production and assembly of 80,000 Round 2 beam spring modules.
The cases, bottom and top inner assembly plates, foam, PCBs, and other small parts were approved for production last month.
The Leyden Jar (for B122 and B104) and xwhatsit (for B62 and BSSK) controllers are all in stock, ready to be installed.
The PBT double shot MX keycaps for the beam spring keyboards all arrived to me with last year’s container shipment, so they are all ready to ship. These are the same keys from the same order as was done for the Round 1 beam spring keyboards.
I am hoping that they complete production and assembly of the remaining items over the coming months.
Again I want to reiterate that the quality of the sample beam spring keyboards received a month or so ago is excellent, and most noticeable is the significantly improved consistency of the key press of each beam module.
For those not following the project closely in the past year or so, the beam module supplier switched and brand new molds were created for the Round 2 beam modules. These new beam modules, combined with the improved assembly quality, has resulted in excellent production examples.
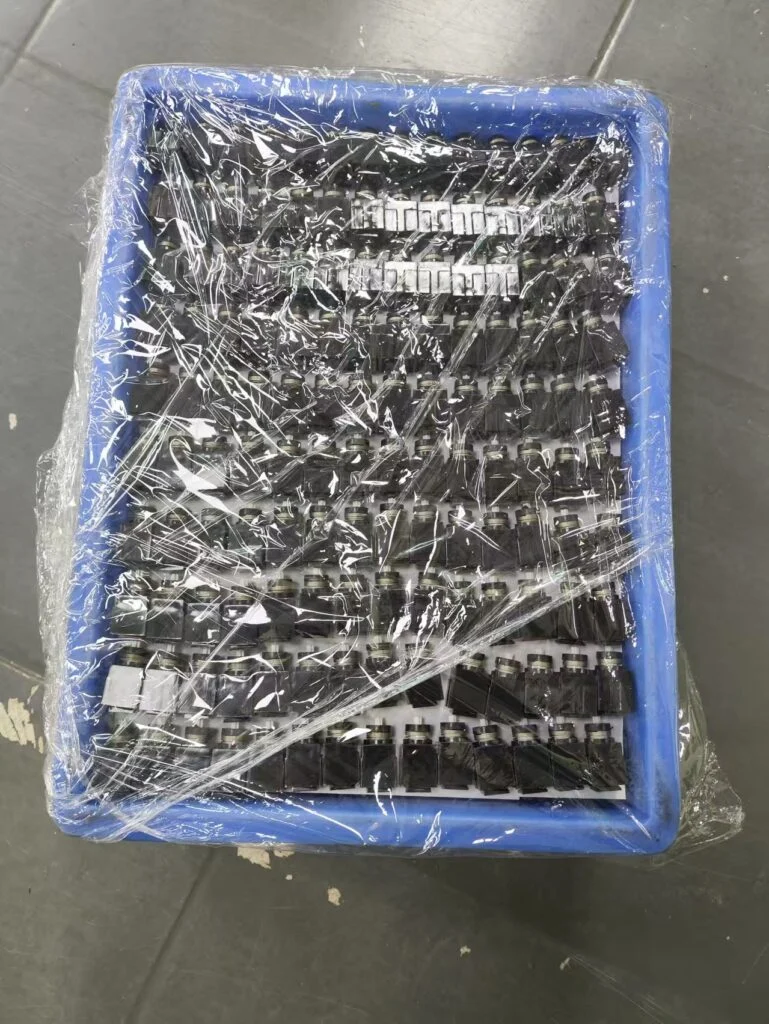
Here’s a photo showing how the modules are being stored while we wait for the other parts to be completed. The modules are on layers in trays, with a cardboard separation between each layer of modules.
Additional Model F Keyboard Layouts: F Split Ortho, Planck/Preonic Styles
I am trying to put together a list of the most requested modern layouts for some possible Model F small production runs. What are some of the newer layouts that are most popular, or classic layouts that have not yet been made?
Please email me if you are interested in any of these additional layouts so I can keep you updated!
So far we have requests for the following which can be made with compact cases, probably 25 to 50 minimum order quantity at a $399 price:
- Ergodox Style Split Ortho with Leyden Jar controllers (one USB cable and second keyboard half connected to the first half)
- 4×12 ortho Model F (Planck style)
- 5×12 ortho Model F (Preonic style)
- 6×12 ortho Model F
- F20 num pad
Requests for die cast only cases (needs around 150-200 minimum order quantity for a $399 keyboard cost, unless some folks chip in for the tooling):
- Unsaver
Please do reply with any other popular requests that you think can reach the minimum order quantity!
For Model F Preonic and Planck style keyboards (5×12, 4×12, or 6×12 ortholinear) what kind of case styles do people like? Please share photos and links.
I am looking to do an updated split ortho board with Rico’s Leyden Jar controller (I hope for UART communication between split halves and PS2 support for the Leyden Jar controller which was being looked into). Rico noted that it should be possible to power everything with one USB cable to the computer, and then a 4 pin cable can both power and communicate with the other keyboard half through UART. The 4 pin cable would be the only connection to the second half; a USB cable would not be needed for the second keyboard half.
Everyone please feel free to contact Rico if you are able to help with the UART communication, the PS/2 daughterboard project, and/or BLE / RF wireless part of the Leyden Jar controller. Or maybe it would be better to connect a regular USB wireless keyboard device to the Leyden Jar instead of connecting a BLE module by serial / UART.
For small production run cases without a mold we would probably be limited to the style of cases found on the F15 split ergonomic keyboard for example – 3 pieces assembled together, unless folks can point to other nice small run project cases. CNCing the cases from a solid aluminum block would be too expensive.
We may be able to eliminate part of the bezel thanks to wcass’s success with 4 layer Model F capacitive PCBs to remove the need for large traces on the perimeter. To keep the original 0.8mm thickness each PCB layer may have to be too thin though for effective capacitance sensing; I am not sure if this was tested.
The most important thing though is to try to get the word out about these old style keyboards that have already been made – if anyone can help that would be great!
New Professional F104/FSSK Keyboard Photos
I have finished taking photos of some of the new F104 and FSSK variations.
Full-resolution photos can be viewed at this imgur album link: https://imgur.com/a/EIebi75
The first photos in the album are the F104, followed by the FSSK, and finally some beam spring B104 sample keyboard from several months ago.
IBM in the news: History of the IBM PC and IBM PS/2
The IBM PC turns 44 years old this year! Here is a nice article from Techspot posted recently:
IBM’s innovations are fascinating. The article notes that they sold 750,000 PC’s in the first two years – that is a lot of Model F keyboards!
Does anyone have documentation on the original IBM PC 5150 (XT style) keyboard pricing? Not for the 5150 clone boards.
The F122 originally sold for $295 in 1984, or $895 in today’s dollars per the IBM announcement notice:
Customer Images – lots of images and posts as many hundreds of keyboards have shipped in recent months!
With permission I am sharing a photo someone took of their own keyboard in the past day or so, which they report has held up well with daily usage over the past two and a half years. Very little wear. I think it matters how you rest and move your palms and hands while typing, and if you follow the “don’t rest your palms” advice from your teachers back in typing class! Since we are not talking about plastic with no coating to wear off, some folks will wear down any unprotected, painted surface that they are in significant contact with every day.
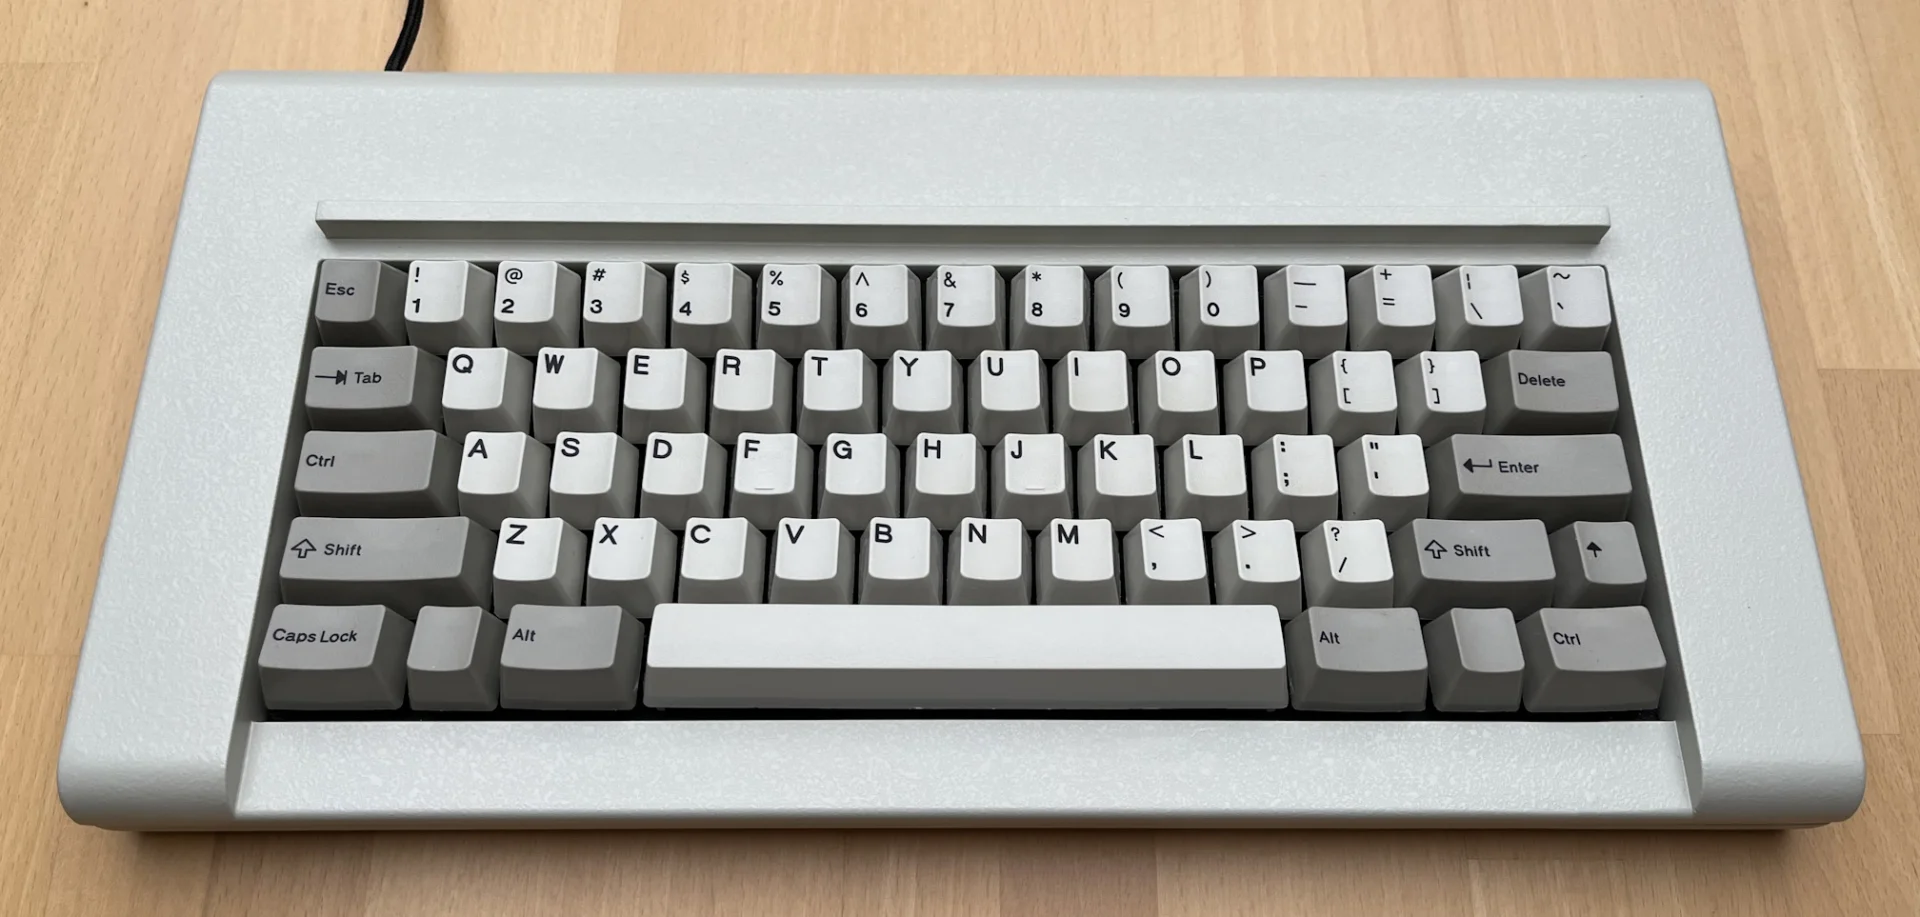
Here’s another customer image, this time of the Industrial SSK 12 key set installed on a Unicomp Model M keyboard as well as on an F77 in Industrial Gray:
With permission I am posting a nice custom setup of the F15 split ergo keyboard. There are still 2 of these remaining that are available to order.
Please do keep sharing photos of your new Model F and new Beam Spring setups! All kinds of custom mod projects are exactly what I am hoping to see more of.
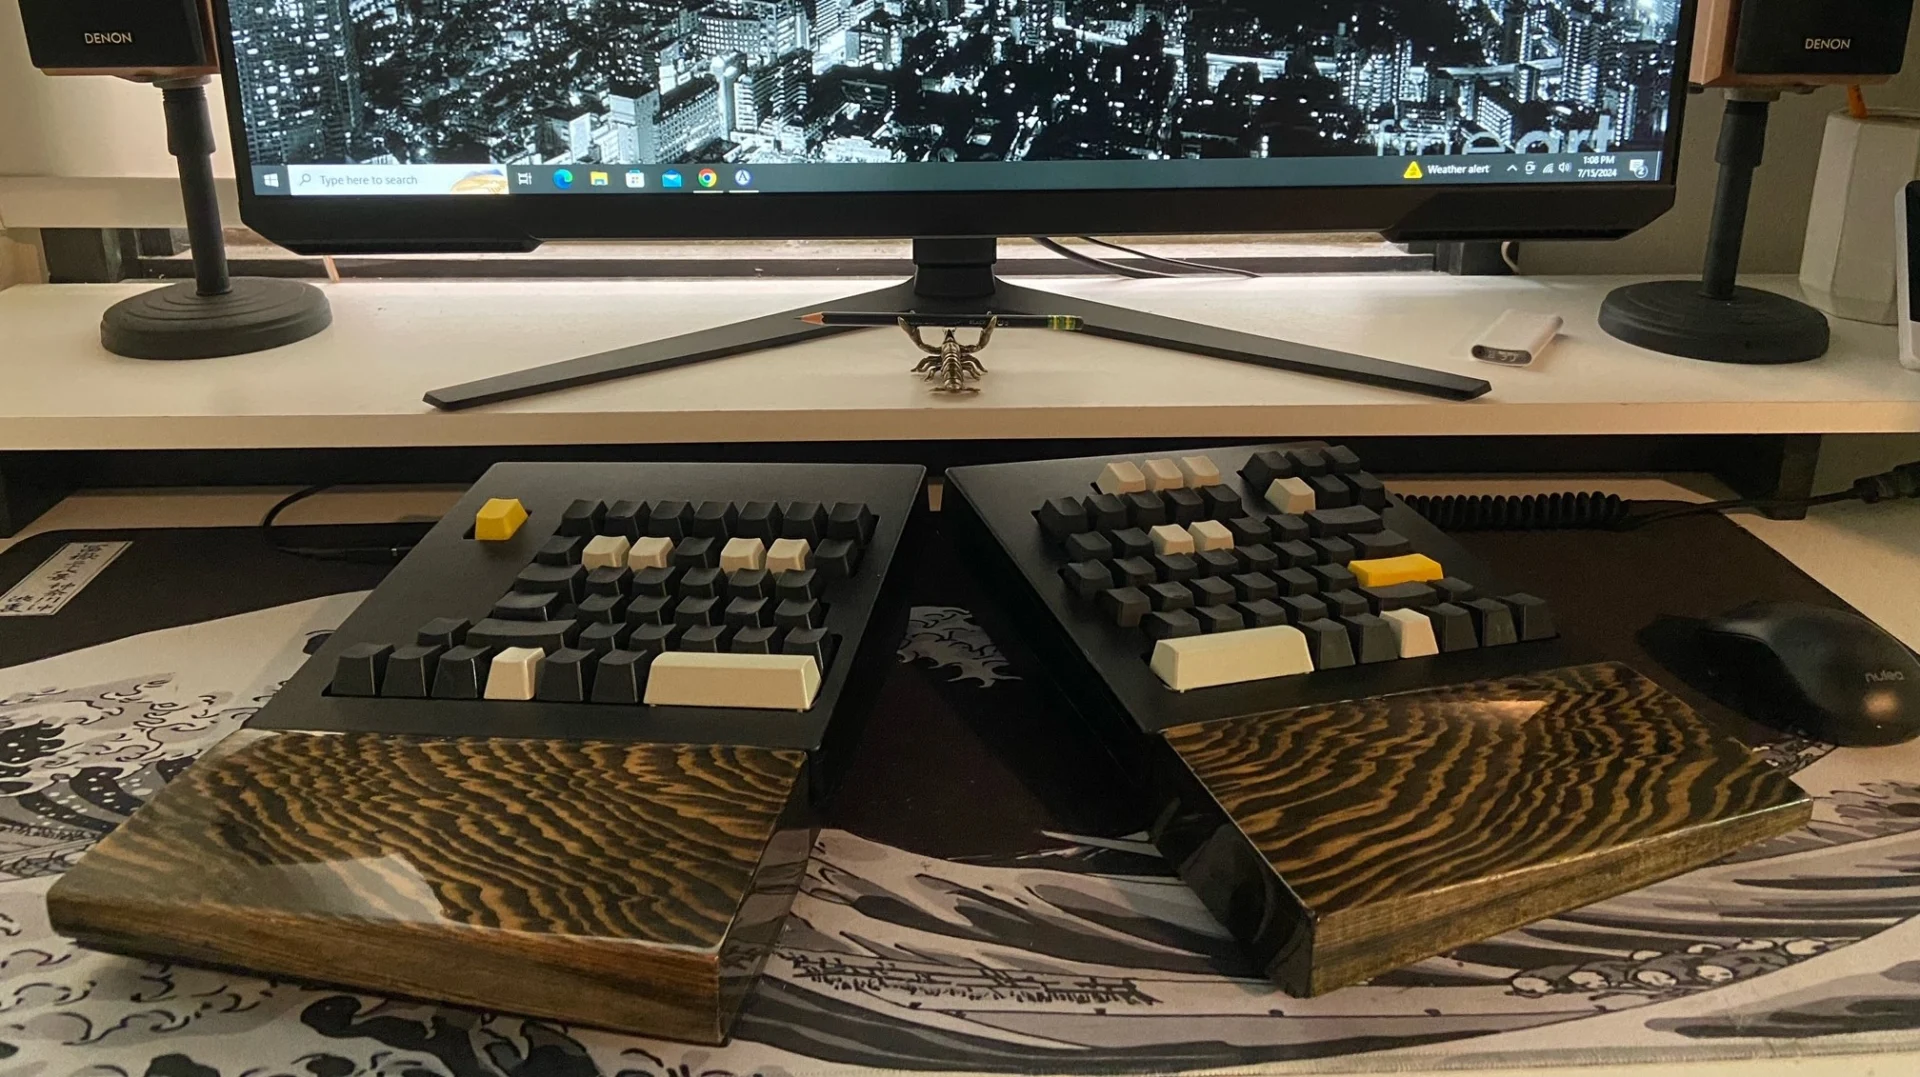
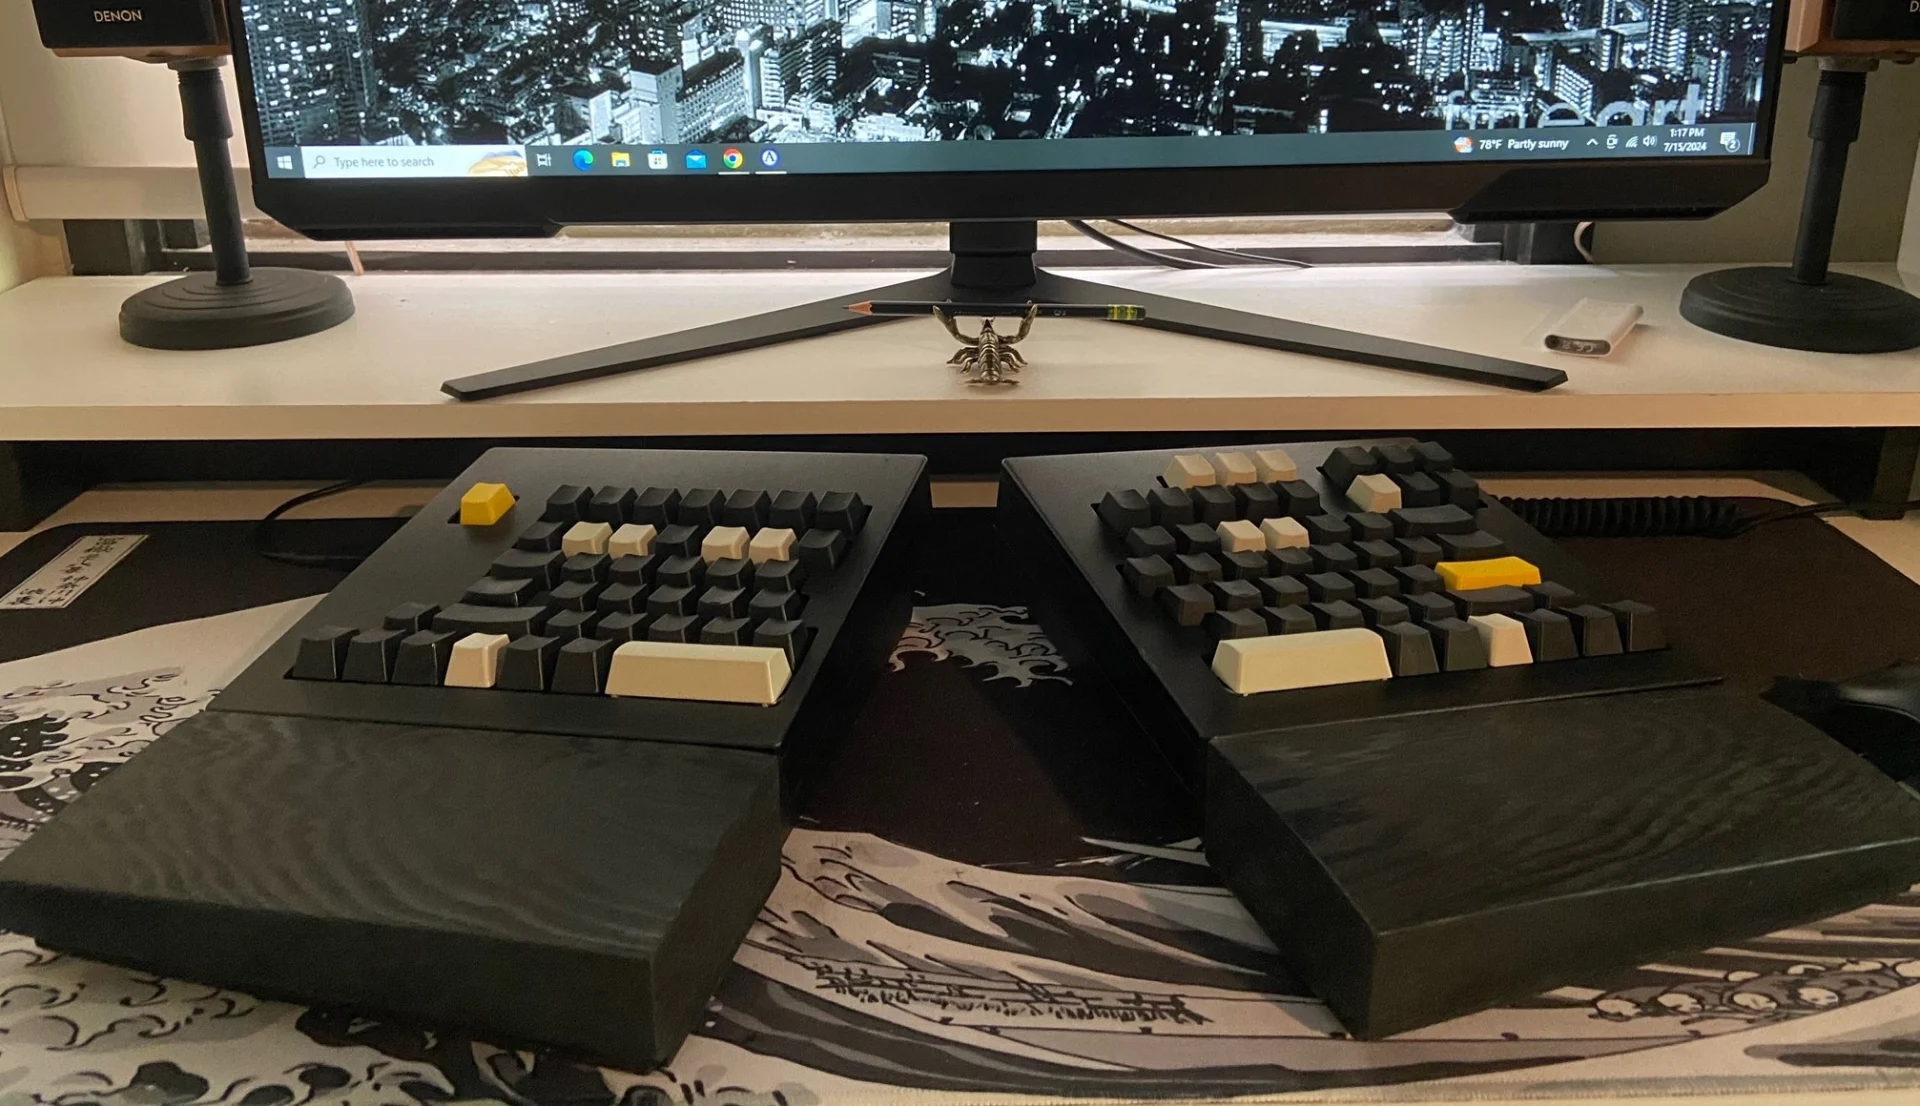
This custom mod setup focuses on making things as solid and with as little movement during operation as possible, tenting the keyboards using custom cut pieces of solid wood so that everything stays in place. I have copied the description below:
“(1) Tents: Hand / chop saw cut out of 2×8 pine. Sanded and spray painted black
(2a) Black Rests: Hand / chop saw cut out of 2×4 pine. 1/8 inch board bases. Glued. Shaped with a wood shaper tool. Sanded and spray painted black
(2b) Wood Rests: Hand / chop saw cut out of 2×4 pine. 1/8 inch board bases. Glued. Shaped with a wood shaper tool. Sanded. Stained. Spray painted lacquer. Fine sanded and polished.
(3) Keycaps: Mix of Unicomp and New Model F keycaps”
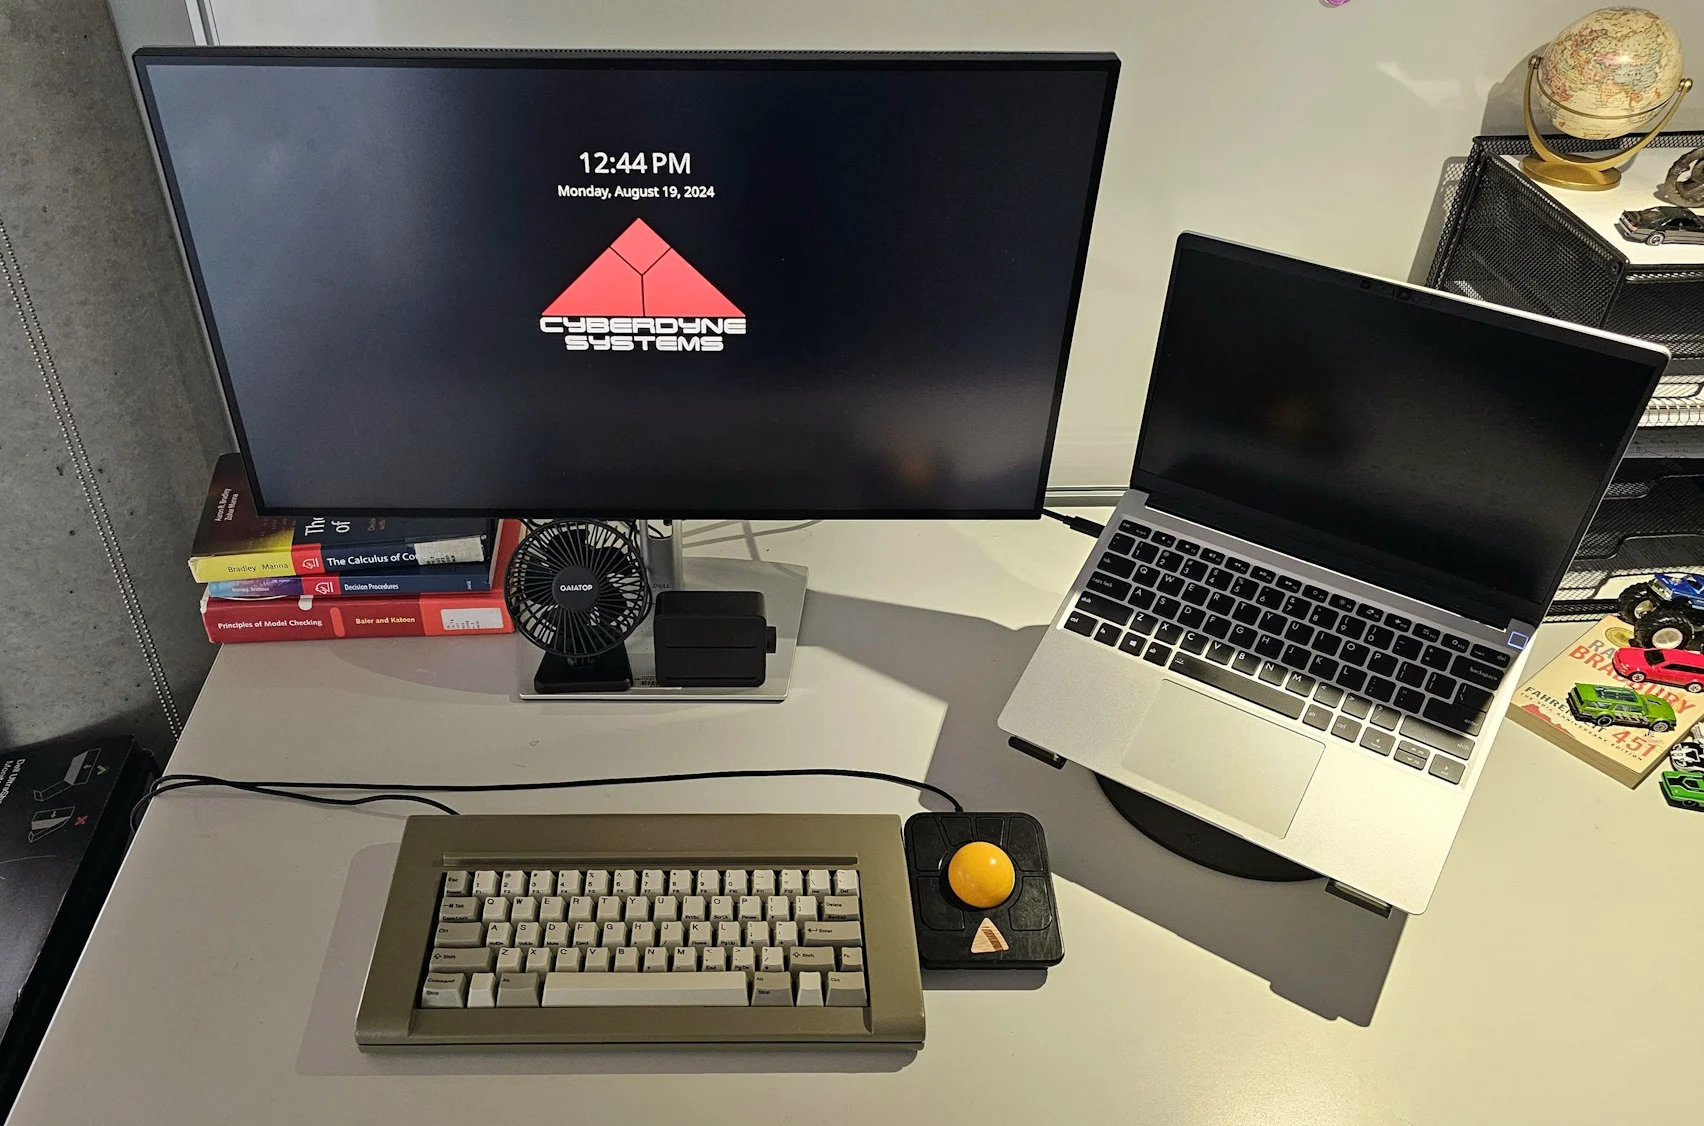
With permission I am sharing a nice setup with an Industrial Gray F62, the HHKB Front Print Key set, and a trackball: “the F62 and a Ploopy Adept, both running Vial, connected to a Framework 13 running Arch.”
A very artistic set of F62 photographs was posted by forum member nac5605; I like the lighting especially:
Here’s a clear photo of the classic zinc case F62 Kishsaver that was just posted on reddit. This one has the Mac Text keys installed:
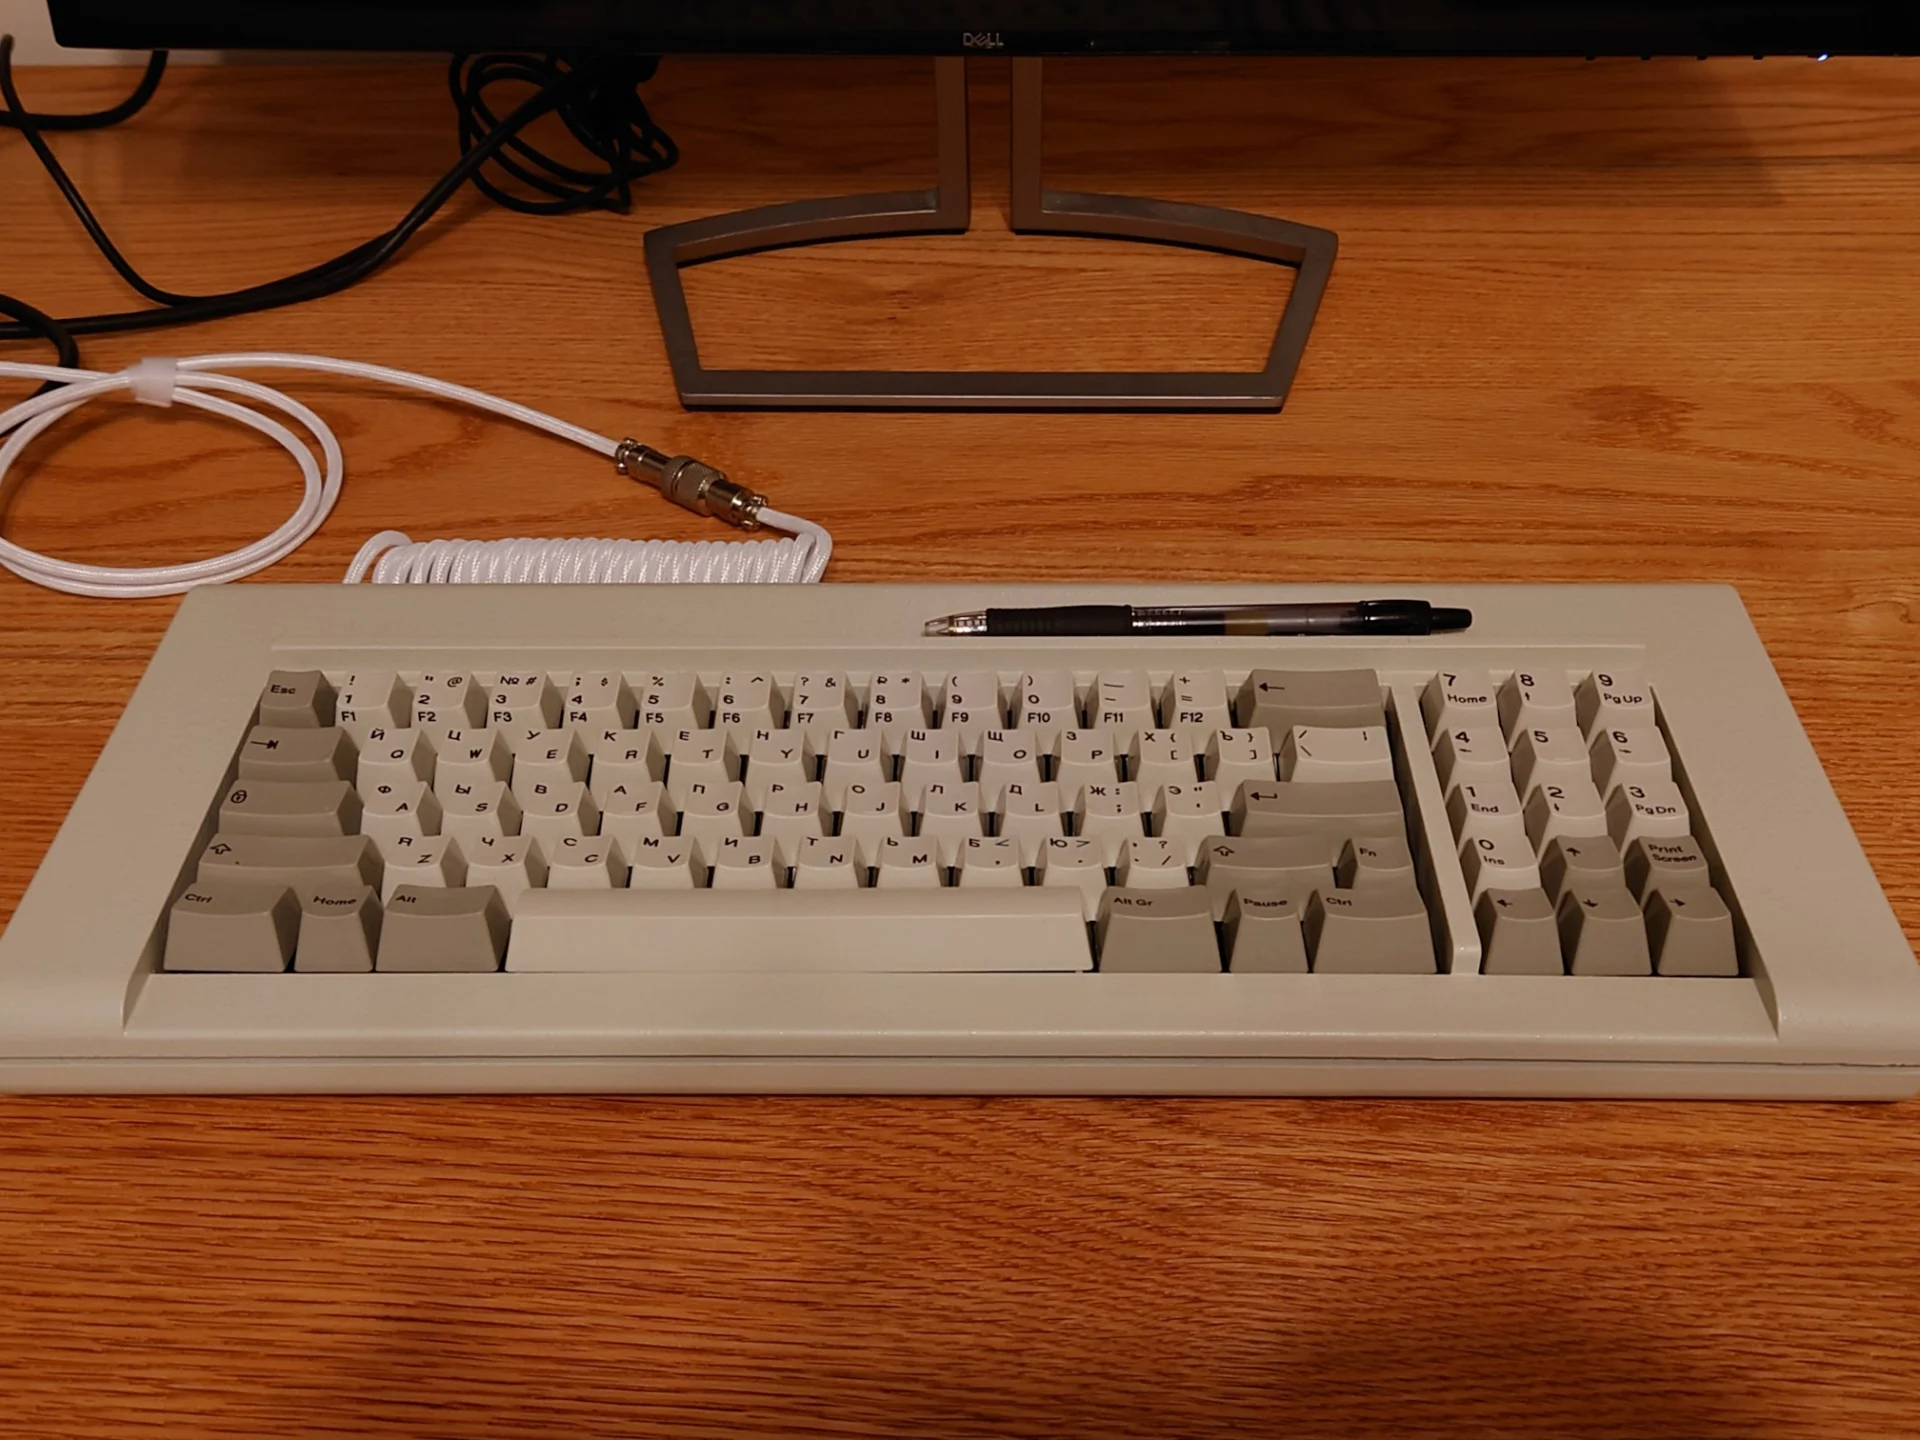
Sharing (with permission) the first photo sent to me of the Russian Cyrillic layout on an F77, with F1-F12 front printed Russian Cyrillic keys and the HHKB layout.
Here’s a nice and quick review and photo from a user on reddit. The photo compares the Model F to the original Model M keyboard. The case dimensions are exactly the same but the Model M looks bigger due to the camera angle with the Model M keyboard being in front of the Model F.
And a nice photo from reddit user Phil_Goodman, with the F104 in Industrial Gray and a 48 inch computer monitor!
One more photo and review – this one has a red Panic button from Unicomp installed in the Esc key position:
We also have the first videos featuring the new dye sublimated Model F badges! From the same F62 poster above. For all models, these badges can be placed on any flat area of the case, whereas the F122 has a recessed spot for a badge. They are adhesive backed and have a protective clear film on the front which should be removed.
Solenoid disabled: https://www.youtube.com/shorts/fb2Z285ec2k
Solenoid enabled: https://www.youtube.com/shorts/24JguBwS_pI
Here is a nice photo from deskthority forum member dr_xadium showing off the beige new Model F keyboard in front of an original IBM Personal System/2 computer case (a custom modern PC build in an original case). I was confused initially as I wasn’t sure if that was a Model F or Model M in the photo upon first glance! It matches nicely with the IBM beige color of the computer.
And their next post compares the new Model F beige keyboard with an original IBM Model M beige case:
And an additional post reviewing the custom Model F solenoid: “For those on the fence about getting a solenoid in their keyboard – after a few days of living with the solenoid on the Model F keyboard I can say it’s not just a gimmick to make things louder – the feedback it gives really adds a kick and crispness to the keyfeel that you miss when it’s turned off. It makes the typing experience that much more satisfying.”
Some nice scymnc and HHKB style split right shift classic style F62 case keyboard photos posted by Deskthority forum member zappazappa:
We have a bunch of nice photos and a review from forum member del20nd. There was some initial confusion over the correct orientation of the stabilizer inserts but it was figured out ok.
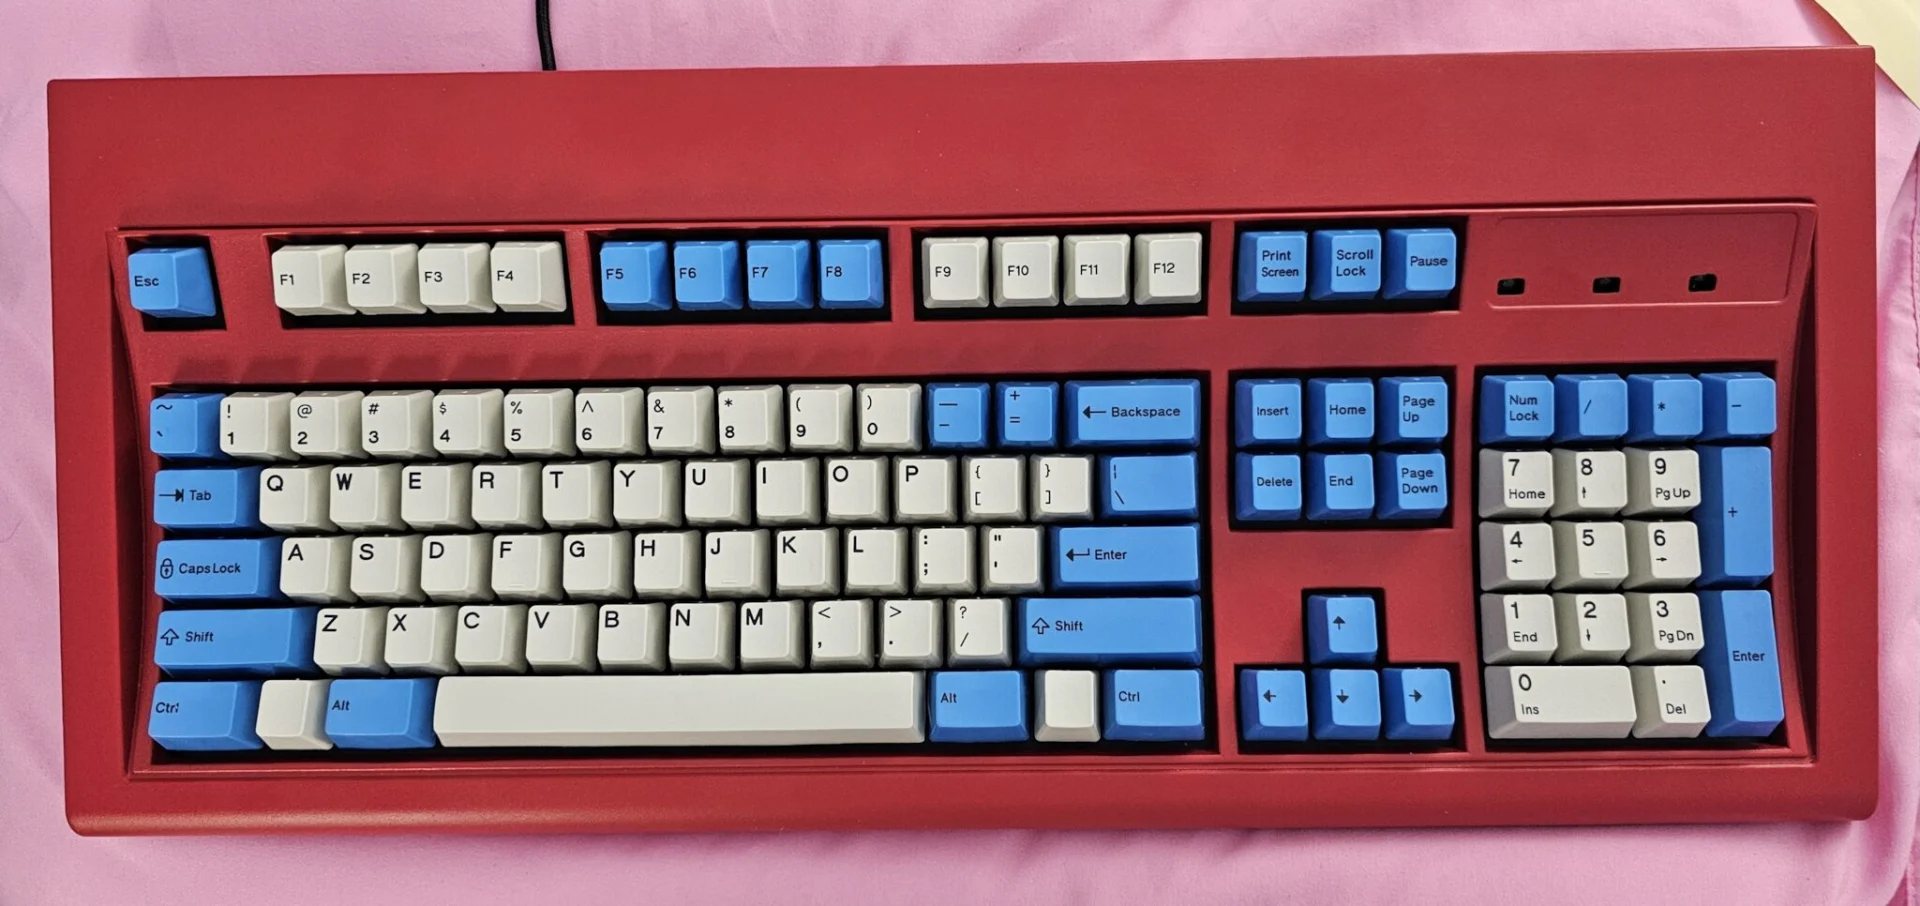
With permission I am sharing a customized keyboard “setup in progress” photo from a new Model F user who has asked that the photo be credited to his first name Mike. I very much like the blue and pearl keycap combination, which is different from the regular all blue or pearl and pebble keycap combinations that are currently available. Additionally this combination looks nice as installed with a True Red case.
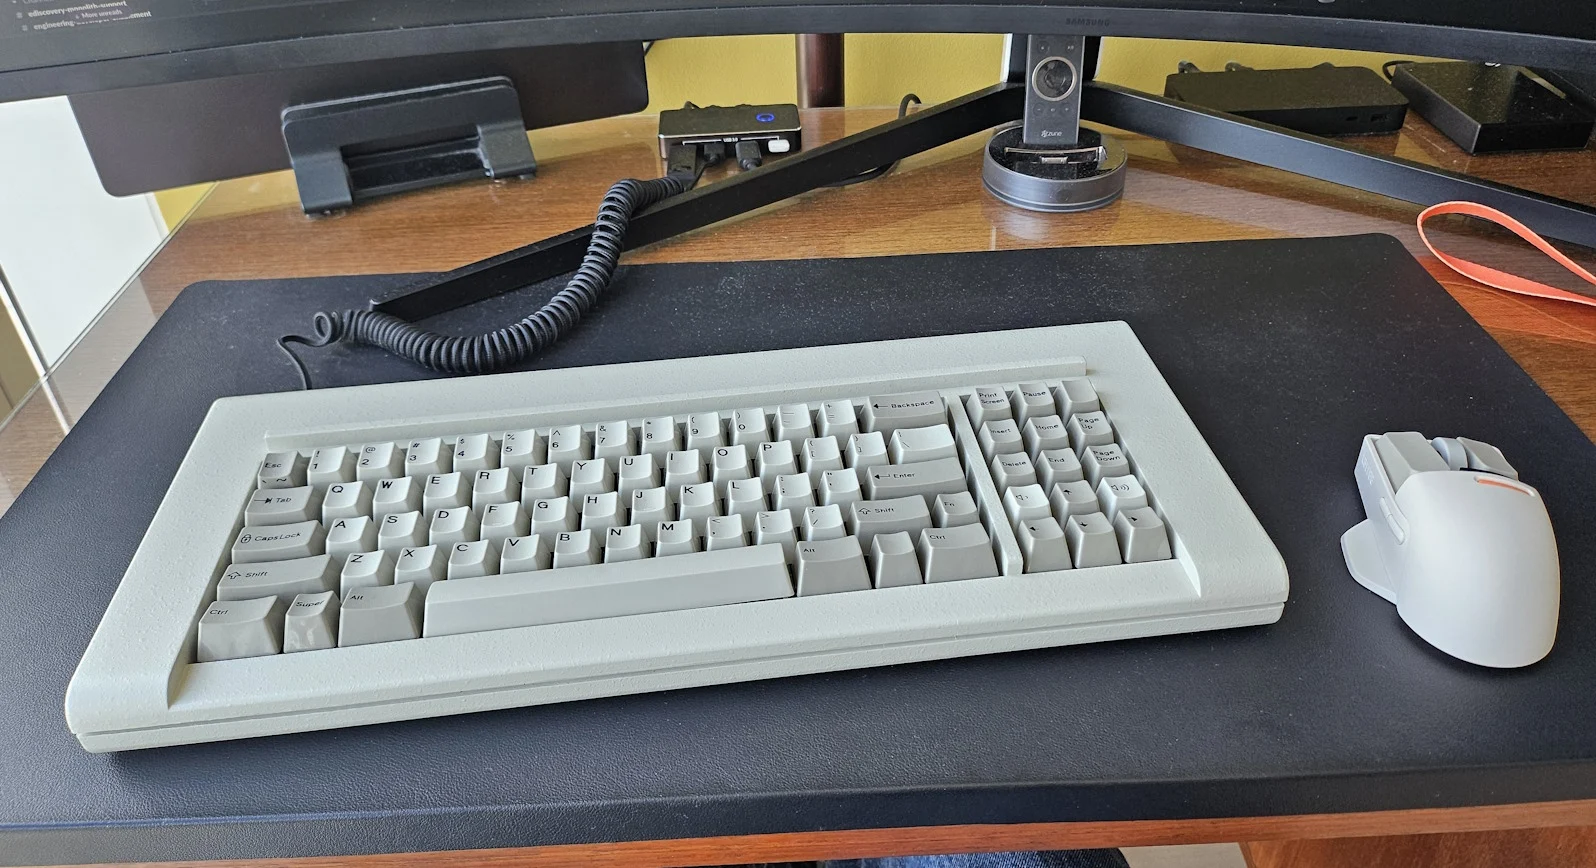
With permission, I wanted to share another nice setup with a custom coiled USB cable and a powered USB switcher hub that appears to be working well with the F77 (unpowered hubs tend to cause issues). The coiled cable adds a nice touch.
“The mouse is a Lofree PBT Touch, I coiled the cable myself (wrap tightly around wooden dowel, secure with masking tape, treat with a heat gun), and the hub is actually a USB 3 switch to toggle between my PC and Mac. Made by RSH Tech”
Major updates to the manual, and more: I have also put together a summary of the various updates in recent years, for those wondering what has been going on with the project
For those who have followed the project over the years and are still considering joining the project or picking up an additional keyboard while prices have been discounted and stock is still on hand, the good news is that the manual has been updated and is now a step-by-step guide to setting up and maintaining your new Model F keyboard. Additionally, there is an hour long step-by-step setup video included in the manual. I have received lots of feedback over the past year from those brand new to the hobby, who are not on the forums, and even newcomers have told me they were able to follow the setup guide easily and there was no trouble in setting things up. No one has to go all over the place to find information anymore as everything you need to know to set up and maintain your new Model F is organized in the manual now.
No more QMK web site: The old QMK is gone, not even an option on these keyboards any more. The firmware is now exclusively Vial, thanks to DT forum member NathanA. Can use the Vial program for offline use or go to the web site Vial.rocks using a Chrome-based browser. You don’t have to load any configuration files as the keyboard is recognized natively by both those options. The latest firmware is flashed on each 104/SSK, so it is not necessary to flash anything to change your keymap options. New firmware is now flashed with a bat file or .sh file for linux instead of directly flashing a hex file. This means that it’s a few steps now, but all you have to do to flash new firmware is install the atmega drivers, download the QMK-layout-files.zip file from the manual, and double click the bat file that you want to flash. The bat files are named to correspond with the keyboard, round, and layout, for example “f104 r2 ansi HHKB Split Backspace.bat” is for the round 2 Model M style f104 keyboard with ANSI style layout (ANSI style Enter and left shift), HHKB style modifications (split right shift and swapped caps/ctrl), and split backspace. The bootloader mode is accessible by a key combination or more easily by clicking the Enter Bootloader button in the pandrew utility available in that same zip file mentioned above.
All in stock instead of made to order: The F104 and FSSK variations are now all in stock. Shipping started in September and the backlog will continue shipping this month and should wrap up next month. As opposed to the made-to-order nature of the prior projects, I made many extra keyboards so that everyone can still order from current stock in the near future and get a keyboard from this completed batch.
Clear order status now at the top of the Updates page: The top of the Updates page now describes a detailed order status for each item, for those eager to see when their keyboard is expected to finish assembly and/or ship. I also detailed all of the reasons behind the tooling and production delays (one main issue was getting the cases right – delays were due to both the time to complete the tooling to make the new die cast molds for the cases as well as making sure the production quality of the cases met my standards).
Case material is now die cast aluminum instead of die cast zinc but the keyboard is still very heavy because the layout is bigger. This allowed the package weight to remain about the same so I didn’t have to pass along a shipping cost increase. The case was designed to look like the Model M on top, but with the bottom being modified to be more like the XT bottom cases (just a curved metal plate) so I didn’t have to make a mold for the bottom cases and so the thicker Model F inner assembly could fit in a Model M-sized case. The case bolts are now countersunk and T8. There is now a spot inside each keyboard case to mount both the solenoid and driver. There is a choice of 12 LED overlay options.
Controllers: The F104/FSSK controllers are still the ATMEGA32 based open source design, but they now support 3 LEDs and a solenoid at the same time, thanks to updates by pandrew and wcass. The RP2040 based open source controller developed by forum member Rico (“the Leyden Jar controller”) is not used with the 104/SSK, but it was completed and is being used in all of the 122 keyboards as this controller supports 18×8 matrix (2 extra columns) compared to the ATMEGA controllers which support a 16×8 matrix. It is also exclusively Vial, no QMK. There are plans to extend support of this controller to the other new Model F keyboards for future compatibility once the ATMEGA chip goes away. Two of the most talked about new features planned but not yet implemented are PS/2 support and the ability to connect one Leyden Jar controller to another Leyden Jar controller for the purposes of using the controller in a split keyboard like the Split Ortholinear Model F Keyboard. This controller has the advantage of more memory for complex macros and layers, but I have not seen any real-world performance differences. The optional solenoid can be powered on and off by a key combination.
NKRO: NKRO remains disabled by default for compatibility reasons; the manual describes a Vial option that can be set up to toggle NKRO.
Reorganized manual: The manual has been thoroughly updated and reorganized based on feedback over the past few years. An hour-long, step-by-step setup video has been created and the included green booklet now instructs everyone to follow the video and manual exclusively to set up their keyboard. The manual is now comprehensive and it includes every setup, maintenance, and troubleshooting step needed for a new Model F keyboard, so folks won’t have to spend hours trying to think of their own way to do something. One no longer needs to visit any other web sites or consult any other manuals unless you want to do something advanced like compiling your own firmware. I have also been more vocal about the project philosophy, writing it up at the top of the manual and discussing it elsewhere, which explains the reasons behind the project philosophy focusing on teaching everyone how to maintain their Model F for life instead of relying on Genius Bar type folks to answer every question for you for the one-year warranty period and then encourage you to buy the newer model because it is impossible to repair the current product in a cost effective way. My position is that the current manual is the only place you need to go for the Model F and almost every possible issue can be fixed on your own by reading the manual from start to finish instead of emailing me directly for any issue. I also created a “Model F vs. Model M – what are the differences” video and put it on the home page as that appears to have been a big help. Other small changes for clarity: for example, Right Ctrl is now Right Ctrl and not Fn as it was before (the key between right Alt and Right Ctrl is now the Fn key).
Big price drops on previous Model F project: It has been 9 years (!) since the Brand New Model F Keyboards project started and now the original models have been discounted by a couple hundred dollars as that project draws nearer to a close, so those with smaller spending abilities can pick up a smaller layout new Model F for as low as $175.
Here is the new Mac F1-F15 set, designed to match the legends style of Apple’s keyboard. Now available to order on the Extra Keys page.

USB-C Flush mount mod by Deskthority forum member pilcher
Model F Snappiness vs. Press Force
Over on the geekhack project thread, there was some discussion on the variances of Model F keyboard snappiness vs. press force and what the potential causes of that may be. Here is what I posted:
I think it is a matter of the tolerance between the keycap placement within the barrel and the spring free length. For example, if the spring free length increased and nothing else changed, the key press force might increase a little. The XT barrel and some AT barrels may leave a key slightly lower down in the barrel for the resting position, meaning the spring is slightly more compressed (near the bottom of the barrel, the keycap snaps into place at a certain point which determines the resting place of the key when a flipper and spring are installed in the barrel).
The tradeoff is that the Model F keyboards with that tolerance combination are slightly louder and crispier in their snappiness, but they require slightly more key press force. In general the original Model F keyboards range from the XT side (heavier presses and snappiest) to the F122 / AT / other F’s (about in the middle or slightly lighter in my experience). Less crisp XT examples may have more spring oxidation/rust.
I have seen this doing press force experiments with the brand new beam spring project – a slightly higher free length of the spring results in increased press force grams required. I also did make some Model F springs with slightly longer free lengths that seem to confirm this theory.
Additional analysis on the optimal placement of the spring as installed in the barrel
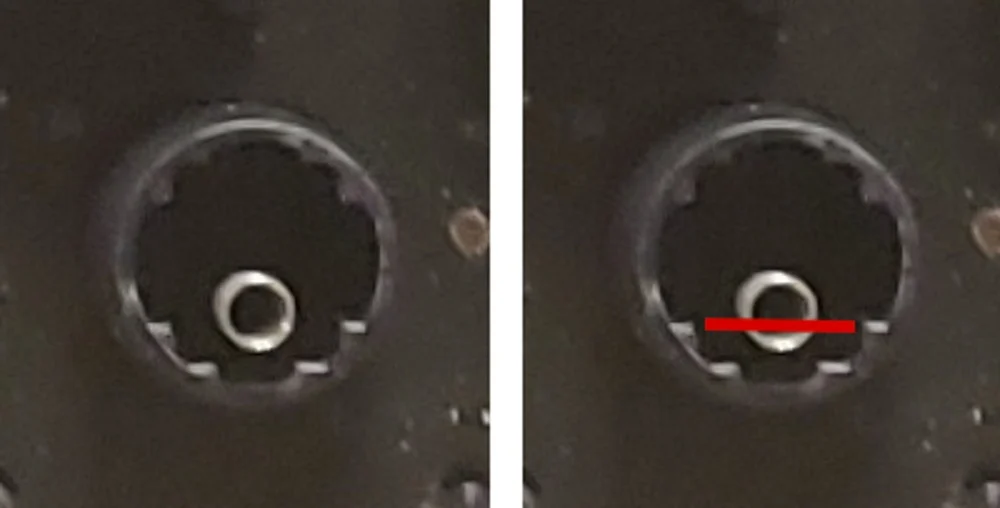
I have updated the manual with some additional information to help those looking to reinstall springs correctly, in the correct 12 o’clock position as well as with the spring about 1mm away from the 12 o’clock position of the barrel when the keyboard is held vertically, space bar end up. If the spring is too high up (too close to the 6 o’clock barrel position), buckling errors will occur as you mentioned. I also recommend swapping the keycap with another keycap to see if the F keycap itself was somehow deformed or damaged.
As reported to me through another GH/DT forum member’s great research back when the project was just getting started 8 or 9 years ago:
It is important for the spring to be close to the 12 o’clock position of the barrel (as shown below) when the keyboard is held vertically, space bar end up, because the click is not strong otherwise and click errors are more likely to occur.
It is also important for the spring to be close to the 6 o’clock position of the barrel when the keyboard is held vertically, number/function row end up, because the key press will cause the spring to buzz if not in this position. This means that the spring cannot touch the 12 o’clock position because then the spring will be too far away from the 6 o’clock position when the keyboard is flipped to the right side up position.
And finally, springs that are installed too much left or too much right compared to the vertical center will cause errors with installation such as keys not working reliably.
Please do share: how do you reinstall and reseat Model F springs when the flipper is installed in the keyboard?
Please let everyone know your techniques, tools used, and recommendations. Toothpick with one end trimmed down? Chopstick? A certain type of tweezers? A small screwdriver with magnet and with the end trimmed off a bit?
Some folks have trouble reinstalling the springs. Of course it is relatively easy with the flipper not installed – just align the end in the proper 12 o’clock position and push the spring on the flipper by hand.
Here is my view: Model F springs really need to be pushed down all the way onto the nub for best results, and the tweezers should be gripping closer to the bottom of the spring like in the hour-long setup video so that the spring is not bent. You should have a firm grip on the spring. A loose grip means the tool is more likely to slip and permanently damage the spring as you are installing it. If anyone is breaking springs while trying to install them then they are not being installed as shown in the setup video, which remains my preferred way to install the springs.
And here is the relevant portion of the manual with my recommendations:
This point and the following few points describe how to remove and re-seat springs, which is the main way to fix keys that are not working well. Our next step is to remove and re-seat any loose/non-working keys. Regarding re-seating springs, in nearly all cases you do not need to take apart the keyboard to fix keys that do not click or spend a few minutes pressing a troublesome key. Reattach the key as shown in the hour-long setup video linked above, with the keyboard positioned as shown in the videos (vertically, with the spacebar row up). After reinstalling the spring, be sure to carefully reinstall the keycap; I like to do this step slowly to make sure that the spring is correctly positioned inside the key because if you are pushing in the key too fast, it may bounce the spring out of place.
Often re-seating a key is not enough to make the key work or to reduce or eliminate a buzzing sound when a key is pressed, and you need to remove and reattach the spring as shown in the QC secrets video. I have found that carefully removing and flipping the spring upside down can fix most spring issues, and replacing the spring with another spring is a last, but often necessary step. Springs must always be removed with a gentle twisting motion (it should come off easily – otherwise you’re twisting the wrong way), never pulled straight up. Twist counterclockwise looking at the spring straight down, like in the below picture. Springs should always be put back by pushing them straight without twisting, as shown in the setup video. Be sure to press the spring all the way down onto the nub of the flipper so that the spring is tightly secured on the flipper. The goal is (1) to have the spring be about 1mm above the 12 o’clock position of the barrel when the keyboard is positioned that way, and (2) have the end of the spring in the 12 o’clock position relative to the flipper, as pictured below. If the spring end is not positioned at 12 o’clock (per the video) and the spring does not touch the barrel, buckling error is more likely to occur.
2024 Container Shipment
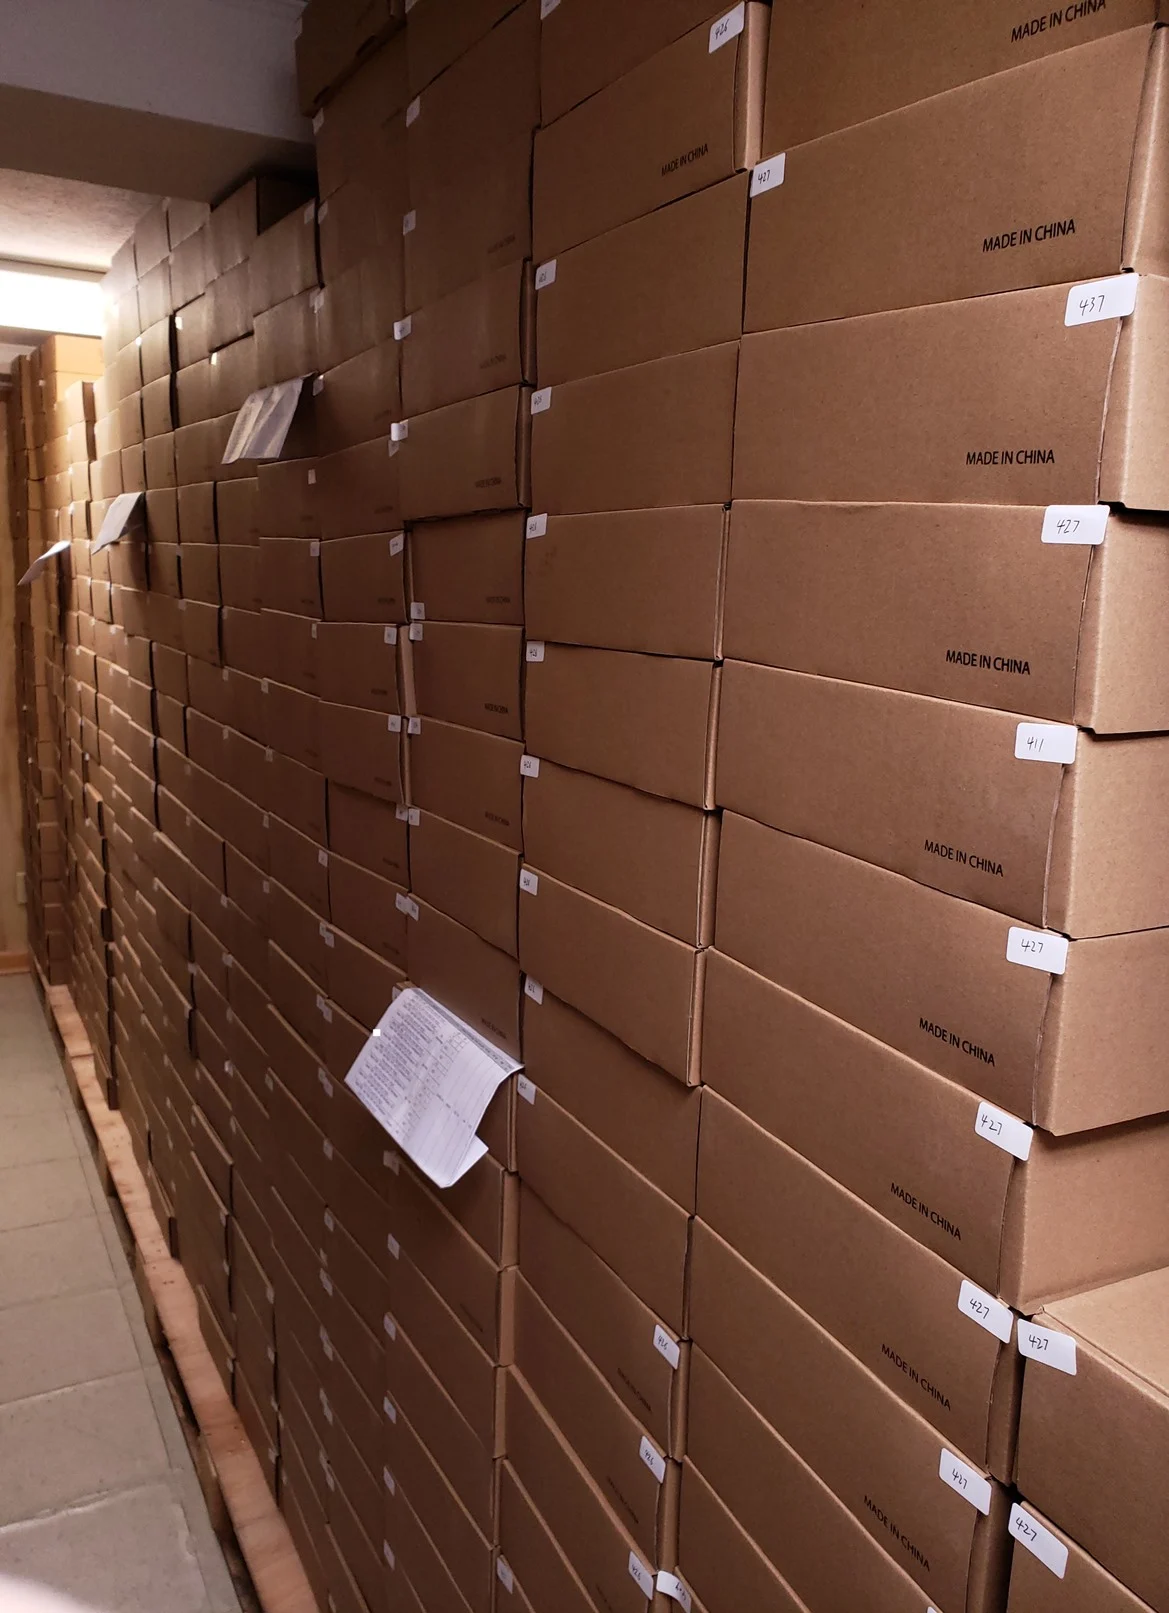
The contents of the 2024 container shipment for this project was successfully delivered back in September. Over 5 tons! This is the 5th container shipment of the various keyboard projects.
This shipment included all the Model M style F104/FSSK and various other parts and key sets. The F122 and Round 2 beam spring keyboards will be on the container shipments later this year once they are completed.
As with the previous container shipments we have some photos of the loading. This one was too big for the 20′ but the 40′ container was not completely packed like last time.
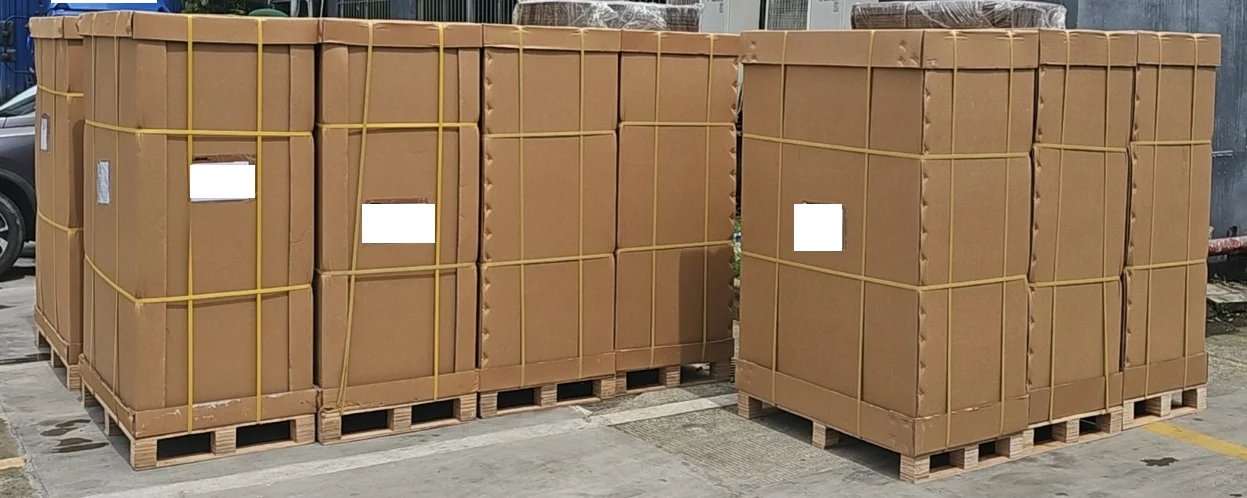
And now we have the first photos of the keyboards after they have all been stored and organized!
Here is a nice, detailed new Model F review that was posted on geekhack
Controller firmware updates
All project keyboards now have support for Vial, thanks to the great updates made by forum member NathanA. You can update your firmware through the instructions and files in the manual on this project web site. Vial has currently been working well and has been a big improvement in usability thanks to its GUI and ability to directly edit the key mappings without having to reflash the firmware every time. The default firmware is Vial for all keyboards except for F62 and F77 which were produced before Model F Vial was finalized. Feel free to add an order note to request that I flash Vial for your F62/F77 as I prepare it for shipment.
Rico has posted the current status and planned updates of the RP2040-based Leyden Jar controller that will eventually be used on the various new Model F and beam spring keyboards. It also runs on Vial.
A big congratulations are in order for Rico’s great success with the Leyden Jar controller!
Everyone please do let Rico and me know if you are interested in helping contribute to any of Rico’s 2025 development areas for the open source Leyden Jar controller.
The highest priority is getting one controller to power and communicate with the other controller so that only one USB cable is needed as I would like to start the next round of the Split Ortho F keyboards which were all spoken for in the first run of those boards with two USB cables (as a note there was no issue sharing function layers and shift states between boards on Mac/OS/Unix thanks to NathanA’s firmware).
Regarding the solenoid and UART functioning at the same time, here was a proposal sent to me:
Move SOLENOID_ENABLE to GPIO26, SOLENOID_PULSE to GPIO27, COL16 moves to GPIO28, and COL17 moves to GPIO29, and then have a firmware version that allows for the UART and Solenoid at the same time without sacrificing the solenoid.
The UART would run on GPIO28 and GPIO29 and it would take away columns 16 and 17 for firmware variations that require UART, while these columns would be normal keyboard matrix columns in all other firmware versions not requiring UART.
These columns 16 and 17 could both be connected to the through holes at the bottom and also to the expansion header (maybe the expansion header would need to be 4×2 or 5×2 instead of 3×2 or larger to accommodate the 4 wires needed for UART and power, or there would be a separate 2×2 header for UART).
This way you can sacrifice 2 columns to have both the solenoid and UART with split keyboards, and with the same controller you can also choose to have those 2 extra columns and the solenoid if you do not require the UART.”
NathanA has posted a guide to making the various flashable keymaps including the hex and vil files:
“The .vil files have always been easy:
- Create your layout in Vial.
- Go to File > Save.
Simple.
It’s the .hex files that aren’t so easy. I used to build special versions of firmware which included a custom QMK macro I wrote that would actually cause the keyboard firmware to “type” the contents of the hex file out onto the screen. So I’d open up Notepad, press the key on the keyboard that ran that routine, and wait for it to finish. But I left that routine out of the shipping firmware, in part because it took up valuable flash space that was best used for other, more useful features.
I eventually figured out a much easier way:
- Create your layout in Vial (or load the .vil file you previously created and saved).
- Put keyboard in bootloader mode.
- Run “dfu-programmer atmega32u2 erase –force”
- Run “dfu-programmer atmega32u2 read –eeprom > output.hex”
(where “output.hex” is whatever you want to call the resulting .hex file)
It’s simple in terms of the number of steps. The main downside with this method is that the ATmega bootloader doesn’t allow you to read from the EEPROM memory unless you first wipe the flash memory. Which is totally freaking stupid, but there’s nothing I can do to change that. (I assume it’s some kind of misguided security-related feature.) What this means is that even if you are creating a bunch of layouts for a single keyboard model, you have to re-flash firmware in between creating each layout. Not only is that inconvenient and a huge waste of time, but it causes a lot of wear and tear on the flash memory. So when I make these, I actually use one of the spare defective wcass controllers you sent for this purpose.
It would be awesome if there was some kind of script or utility that could read a .vil and auto-generate a .hex from that, but writing such a thing would basically require that it be reading from QMK source code files in order to be able to figure out what valid keycodes & their values are. So it would be complex, as well as require that you have QMK/Vial firmware source on your computer.
One thought that I’ve had is to maybe patch the Vial app so that you can run it from the command-line and feed it a .vil file to load into the keyboard, and then immediately exit (the GUI would not display at all). Then instead of shipping both .vil and .hex files, I’d only have to ship the .vils, and the flash script would just run Vial to load the .vil into the keyboard EEPROM at the end of the process. Even if I got that to work, the main downside is that it would require everybody to install Vial on their computer first before they could run the firmware flash scripts, and it would have to be a custom version of Vial at that (unless I can submit my change to the author of Vial and get him to include it in a future release). It’s ultimately probably better for the firmware upgrade package to be able to work stand-alone (without a dependency on Vial), which is why I haven’t pursued this, either.
If anybody has a brilliant idea I haven’t considered, though, I’m all-ears…”
APL Key Set Model F XT Quality – combining Unsaver, Model M, and other APL layout styles
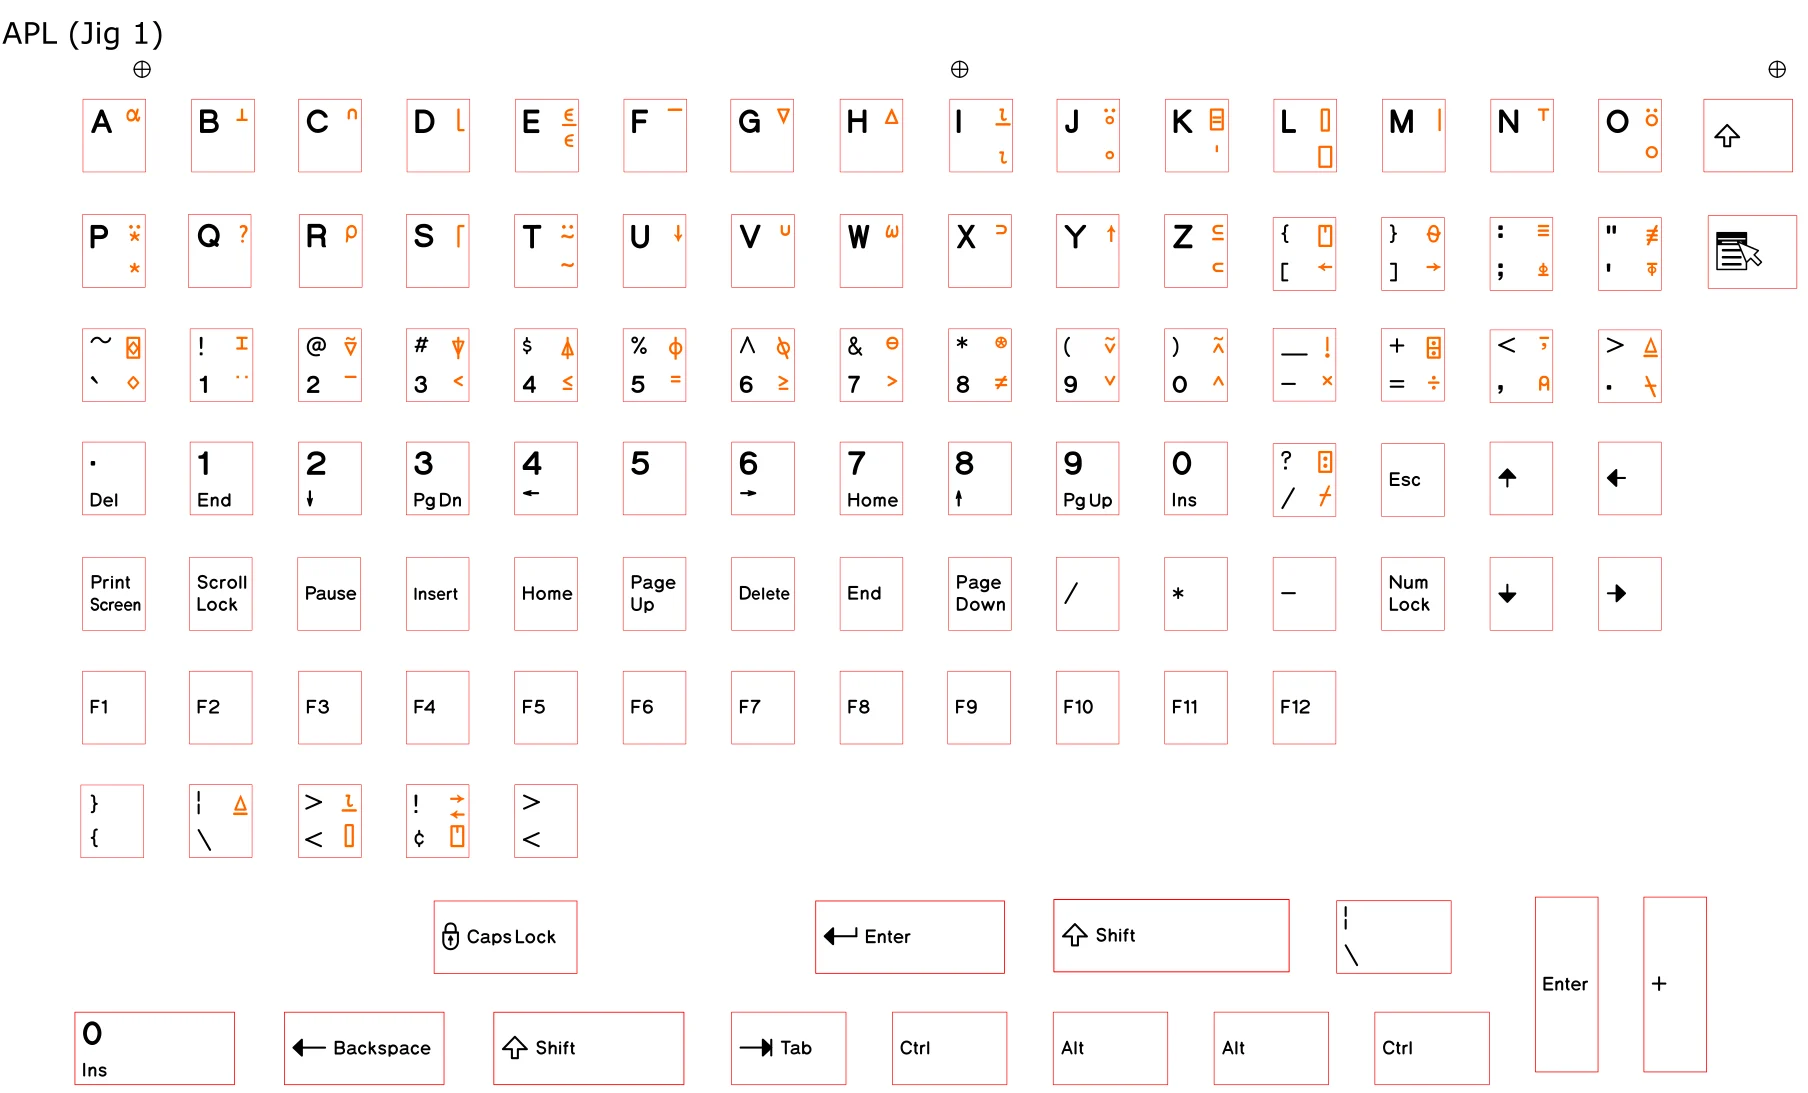
As requested, here is the APL key set that is ordering option for the new Model F XT quality key sets. As with the other key sets like JIS, any front printing has moved to the top of the key.
I have compared several sites discussing and showing photos of the various APL layouts and have added some keys to allow for both ANSI and ISO style APL layouts (though the Unicomp ISO Enter key will currently be only available separately).
What is the best color for the APL legends? I chose an orange that I expect will appear slightly faded or lighter than what is shown here.
The margins look tight but they will be the same as the Russian-Hebrew-English set posted a while back; a good amount of space on the left and right sides of the key tops.
In terms of alignment I wanted to keep it consistent with Zed’s right alignment on various sets including Russian-Hebrew-English, though the originals seem to have mostly been left aligned at a line slightly to the right of center of each key top.
The key sets can be ordered from the Full Key Set product page on the project web site – just pick the APL option as all of them from now on will be this new production set. Please note I still have some Unicomp APL sets which will be sent out unless you ask for me to wait until the new production set is in stock.
Model F bluetooth project success!
Please see the below link – last year someone got their new Model F working with bluetooth. I have asked the project creator to provide a tutorial and more details. If anyone else is working on a bluetooth project please let me know the results!
There are also two other projects not specific to the Model F that may work but are currently not tested with the Model F:
Discussion on the project philosophy; an explanation of the project characteristics
One challenge of a product requiring setup and maintenance is that some folks don’t think it’s worth the effort and they don’t want to do any of that even though all sorts of tech products require maintenance and repairs while most others don’t last long enough to require it. I recently had an interesting discussion with someone who wanted a completely setup- and maintenance- free new Model F keyboard and here is part of that discussion, including the challenges of doing that for small production runs with over a thousand possible keyboard variations while keeping pricing as low as possible for everyone.
For those reading this, how have you convinced yourself and others to put in the extra effort and learning needed to get the best of what’s out there, whether it is a new Model F or something else? Has anyone here convinced someone else to get into the world of mechanical keyboards?
Almost all repairs are rather straightforward after checking out the manual and its setup video to see what is expected: for example, using tweezers to put back a spring that is out of place or damaged or learning how to solder if the ribbon cable needs maintenance.
The question you have to ask yourself: Is it really worth it to spend ~1 hour or 2 of your time doing something else instead of following a step-by-step video and written manual, if it means you won’t be able to maximize typing comfort, speed, and accuracy during 10,000 hours of computer usage over the rest of your life, with a product designed by IBM to do just that? ~1 hour of work for 10,000 hours of benefit. For many people, they will avoid that work hour because they currently do not prioritize a “buy it for life” mindset and don’t want to check reviews and do the research needed to find the best things in life, whether it is a quality car, camera, computer, computer display, keyboard, vacation plan, etc. One goal of the project is to help folks learn how a small amount of extra effort results in disproportionately high rewards.
Your current options are to take an hour or so to learn how to set up and maintain a new Model F or for the expected thousands of hours you’ll be at your computer over the coming decades to go through a series of keyboards not designed by IBM through years of R&D for comfort, speed, and accuracy. Under a scenario with everything set up and taken care of for everyone, I would also have to hire local workers to install and test all the keyboards after each custom order is received because there are already hundreds of variations (not counting the dozens of key set options) and only a thousand or so keyboards in each production run (far too small a run to predict, factory install, and stock each needed variation), which is why they can’t come from the factory preinstalled. Regarding requiring no maintenance on your own, we would need service centers and distributors, genius bars, repair personnel, and tech support hotline workers, and everyone would pay a lot more on top of an already expensive keyboard to pay for this overhead (over a smaller order base, as some folks are priced out even with the current pricing), which is not feasible for such a small project as this one.
Would sales be higher or lower in this other market scenario? IBM had these significant advantages but they were able to charge an inflation-adjusted $800 to $1000 for this product that this new project charges a fraction of that amount, and even IBM/Lexmark couldn’t feasibly continue their buckling spring keyboard operations and support decades ago with a thousand-plus times the volume that we have today. Everyone won’t pay more for that convenience with a steep cost, especially when the keyboard is already so costly; only a far smaller number of folks could afford to do that. The philosophy of this project is that everyone can get repair kits now and learn how to maintain and use a Brand New Model F keyboard long after the project has ended and production has shut down.
Yes the keyboards are fully assembled except for the bumpers and key sets. The keyboards are tested before shipping both at the factory and by me before it goes out; installing keys is not required for testing thanks to pandrew’s signal level monitor which catches many but not all potential pcb issues.
Installing and removing keys, as well as permanently installing unprinted keys, was tried but it added a month or more of delay and it did not improve reliability, because things can still be bounced out of place and sometimes damaged during shipping. Permanently installing the dozens of available key sets would also significantly multiply the hundreds of current variations that have been made, so it would not be feasible for this project. With a larger operation selling thousands of keyboards each year and having the factory ship things out directly this would be doable but the project is far smaller than that.
Regarding things working right away out of the box, that is not the project philosophy or how the project was envisioned. Besides the logistical issues noted above, the project’s goal is to highlight the importance of learning how to set up and maintain your keyboard so that you can use it for many years long after the project has ended, as described further in the manual. Now everyone will become familiar with how to set up and fix small issues with their keyboard because they went through the setup video at the start of their new Model F usage and I am hopeful that this will help more people to feel confident enough to fix issues on their own without discarding the keyboard many years from now.
As part of the discussion I wanted to share one reply post from forum member thefarside:
“I agree with your philosophy and thankfully Model F keyboards don’t require much maintenance. I bought two F77 keyboards and other than installing the keys, they didn’t require anything else. I took one apart and it was very simple. Only two screws!
I prefer DIY and any efforts to keep the costs down. Didn’t IBM rent their 4704 keyboards for something like $100/month in the 1980s?
If you want something to last a long time you have to maintain it. Doesn’t matter what it is. For Model F keyboards my biggest concern would be having spare foam and most importantly, a spare controller.”
My reply: “Yes the keyboards were offered for a monthly rent of $20, $21, or $22 depending on F50/F62/F77 model as of the 1984 price guide (seems like the F107 came a little later?). That’s $60 or more per month in today’s dollars.”
Some additional writings of mine on this topic:
Over the years I have taken great interest in collecting and restoring consumer products and tools that are decades old, sometimes even about 100 years old, and still working just as well as the day they were made, including old electric Telechron / General Electric clocks, Western Electric rotary phones (candlesticks and 300-series phones), and of course the great IBM keyboards which led me to join these forums ten years ago. The main things they had in common were that they were built extremely well and these companies produced tons and tons of spare parts to keep their products running, what I aim for with the reproduction boards. For example the ancient metal framing square that I use for this project was in bad shape, completely rusted, but a vinegar bath brought it back to like new condition, and I am confident it can last for many more decades.
I have been having some interesting discussions over email with a number of folks about the battle between the competing ideologies of buy it for life, right (and responsibility) to maintain/repair etc. vs. the standard big company one-year unlimited warranty, planned obsolescence, and everything is done for you. While folks will disagree with one or the other stances, I offer my perspective in the writeup below, which has been added to the FAQ section on the product pages to help potential newcomers to the project. How can we get more non-disposable products into the world where appropriate?
“Is this type of keyboard right for me? More than 6,000 new Model F and Beam Spring keyboards have shipped to fans around the world in the past decade, but what am I really getting into here? Why would any keyboard require setup and maintenance? What should I expect? Am I willing to sacrifice some of my time to set up and maintain a keyboard that people have believed is worth maintaining for over 40 years, unlike nearly every other computer product that has come and gone?
Just as people have been doing for the past four decades with these keyboards on their own, for most things that come up you are expected to fix them. I am well aware this is not the standard attitude of manufacturers which sell you a short warranty, prevent you from maintaining your products afterwards, and want you to keep buying their products every few years after the previous one stops working. My goal with this product is that you buy it for life, tell your friends/family/coworkers about the project, and buy spare repair parts so if the project disappeared tomorrow you could still maintain and repair your keyboard 10 or 20 years from now. A key or spring not working? Take out your key puller! The good thing is that this is probably the most repairable mainstream, industrial-quality keyboard out there in widespread use and almost everything is easy to fix with nothing more than a screwdriver, key puller, tweezers, and pliers. Every single fix is spelled out with a step-by-step manual and video guide geared towards complete beginners.
A major part of the project philosophy is that you need to be self-sufficient and follow the manual which provides step-by step instructions, instead of trying to do things another way, and you agree to abide by the terms of this project in order to receive service in the event that something is not right (mainly you have to do the troubleshooting steps in the manual as the project doesn’t have the resources to hire folks to walk everyone through the manual on a one-on-one basis, and I am extremely busy coordinating the project and mailing out the order backlog (I’ve QCed and mailed out 6,000 keyboards and thousands of parts orders!).
This is not a hobbyist or kit project; the keyboard is fully assembled and every key position is tested, but there’s an exception: the user has to follow the step-by-step instructions to put on the keycaps and adjust any keys that are not working, and follow the other step by step instructions in the manual. The manual should not scare anyone; it includes every possible issue that could come up with the keyboard and the step by step way to fix it. Most folks only need a very small part of the manual, to install keycaps and adjust a few springs to get things fully working (it may take longer to go through the manual than to do the actual setup!). You won’t be left with a non-working keyboard if you follow the manual; the last step if the steps in the manual do not fix an issue is to contact me and I will help. To read more about the project philosophy, see the manual linked above.
To keep the cost of these keyboards as low as possible for people all around the world (so far to more than 70 countries!), and to avoid the need to charge everyone a lot more to pay for frequent mail-in repair service as with other products (think those $300 to $500 in-home or mail-in service warranties for prebuilt computer systems, etc.), this project has a different philosophy which empowers the end user to take responsibility for following the manual to set up and maintain their keyboard, instead of having others do the work for you; by ordering any item from this site you agree to abide by the project’s terms and conditions at the bottom of the home page and during checkout. One example is that this project’s concept of something being damaged or defective may be different from other standards, and you agree to accept these differences. For example, these products will come not completely working out of the box because you have to install the keycaps and set things up, which includes actions such as adjusting parts that are not perfect and exactly in place, including keys and springs. You don’t get to send everything back for someone else to do the work shown in the manual. Instead, you would go through the manual fully and contact me if the steps do not resolve the issue. Another example: all items sold here are made with cosmetic defects which are considered acceptable, such as surface variations for die cast and injection molded parts, minor paint chipping over time, and other things that you might just as likely see on the original IBM keyboards but not with other products. These defects have been vastly reduced with the later production rounds, however, so do not look to posts from years ago and judge the other 5,999 keyboards and later production rounds based on a few examples.
What attitude should I avoid? You can’t have the attitude “I won’t do what’s in the manual and I expect you to take it back and do the work for me.” It goes against everything explained here and it is why you have to agree to the terms and conditions before placing any order. This includes performing the troubleshooting steps that you are instructed to do, such as reseating and adjusting springs and other parts. If someone else is doing this work for you, you won’t become confident enough to be able to fix and maintain the board in the future and it will end up in a landfill, which is what I don’t want. This is not some product that is fully set up for you, just power it on and take it to the repair shop only for the duration of the one year warranty, and then get rid of it and buy the latest model when it breaks because of planned obsolescence and because it is not economical to repair. Do not try to come up with creative solutions to fix issues described in the manual; just follow each step in the manual which addresses every possibility including the last step that you need to email me, as a last resort, for support for something that is bad.
What if I am nervous? It is ok to not be confident about some parts of the manual especially if these types of keyboards are new to you, but once you learn it all becomes quite easy and it may only take you seconds or minutes to fix something in the future. No experience is needed to work on these keyboards. Over the years people have told me exactly this, so you should not worry, as long as you can follow along a step by step guide while being able to use a screwdriver, tweezers, pliers, and a key puller. If you’re unwilling to do what’s in the manual then you’ll have to ask a friend or family member for help as I can’t guide you. It’s not as difficult as programming the VCR, I promise!”
I am surprised how scary the phrase “some assembly required” is to some folks these days. I’ve always been used to putting together furniture, building computers from parts, and restoring vintage stuff to working condition so I do not associate high end with “no assembly required, maintenance-free.” For some things the whole point is in the joy of assembly (remember Lego bricks, K’NEX, Erector Set, Capsela, Lincoln Logs, etc.)
The new Model F project is here for the primary objective of creating lifelong Model F users who are confident enough to spend some time to set up and maintain these keyboards, not people who are used to a maintenance-free product that is discarded because no one knows how to fix it, and then it ends up in a landfill. Those folks may better be served with another product and there is no issue with discouraging folks who cannot adjust their outlook to match that of the project.
As was stated in the Project Management Triangle that I have brought up before, everyone would like products to be good, fast, and cheap but those are all opposing forces. To hire workers to assemble and mail orders faster would entail a higher cost. To set up keyboards for everyone (make it “good” for some perspectives) would require a higher cost. To keep the cost low, compromises have to be made and the biggest barrier to this project for most folks is the original $800 cost that IBM charged (adjusted for inflation). The first compromise was “fast” (speed) in that the project is essentially hand assembled with the help of some custom machines but with no expensive pick and place machines for keycaps, etc. Nothing matters if you are happy with the idea of a product that is high quality and fully ready to go, gets to you fast, has free tech support and no maintenance, if you can’t afford it to begin with because it has IBM’s price tag that was required to maintain all of IBM’s fixed costs including automated installation machines, assembly workers, and support personnel. I will continue to remain steadfast in the project philosophy choosing high quality products at the lowest possible price for the most part, in order to maximize the number of folks who can experience a Model F, while trying to set expectations with folks who don’t want to learn how to keep their keyboard working for life.
A suggestion about asking a US-based keyboard factory such as Unicomp to perform all of the setup labor for everyone highlights that some posters may not understand the differences between these two types of keyboards and about the nature of the opposing forces mentioned above. The Model M has zero parts that are shared with the Model F, with one exception: not even the springs and keycaps are the same, though the keys are compatible. The Model M I believe has a custom-made assembly jig that installs the keycaps, which would be cost prohibitive to remake and configure for the dozens of different keyboard layouts available on the Model F as opposed to the 4 layouts of the Model M (SSK and full size, ANSI and ISO for each). In other words these other factories would have to install keys by hand, so there are no savings with automation. This suggestion would only increase the cost of these keyboards because each person getting a keyboard would have to pay extra for someone to do the setup work for them. The only other alternative is to cheapen the quality of the keyboard to free up some of the cost to pay for assembly, which is not something I’d like to do. Unfortunately we just have to admit that there is not as large of a market for very high quality goods any more compared to what IBM was able to mass produce with their IBM PC’s in the 1980s. Even IBM admitted this as they eventually had to discontinue / spin off their buckling spring keyboard operations when the market changed in the 1990s. Eventually some product’s one-year support warranty will run out and then you’d be in the same place as you are when you get a Buy It For Life Model F keyboard, but with one difference: you wouldn’t necessarily know how easy it is to repair the keyboard so you remain too timid to keep that key puller and tweezers handy for a quick maintenance fix.
It seems like those willing to install a few keycaps for a Model M would be perfectly at home with the Model F, which would require no different skill set from what would be expected of you as a Model F user, except you’d need more time to install the keys yourself and you may need to spend a few minutes moving some springs back into place. It sounds scary but it is not; the video in the manual shows that it is an easy process that can be learned.
How many folks are willing to pay $575 and wait several extra weeks for an already costly $400 keyboard just to have a US-based warehouse to install the keys and adjust some of the springs, if some springs and keys still need adjustment after shipping anyways? Either way outside of service professionals making house calls you would end up in the same place as you are now.
The project has had zero changes in this philosophy for the past 8 years and 5,000+ people who have supported the project – everyone has had to set up their keyboard, whether or not the keys were preinstalled. Every now and then a discussion comes up where some folks are surprised that they have to install keycaps or perform small maintenance to keep their keyboard running. To those who have been maintaining and collecting original Model F keyboards, the need for some small maintenance is definitely no surprise and it is in line with my own experience. I’ve had to completely disassemble and reassemble my original Model F keyboards, sometimes more than once.
Having to install keys is not buried, it is noted on the home page and on every product page. Very few folks think that it is the most important thing about a keyboard as many other high end keyboards have their keycaps separately bagged.
In summary, I feel the project’s current stance on factory assembling as much as possible (everything but the keys and accessories), requiring everyone to learn how to set up and maintain their keyboards for life, and keeping the keyboards at less than half the cost of what IBM charged were the most important priorities that were achieved with this project.
So far I am unconvinced that the project could sustain even higher costs that would have to be passed on to each end user, or that volumes would increase so much from advertising these keyboards as having the keycaps pre-installed that the project would be able to recoup the additional costs by having a higher quantity of keyboards ordered. As some may recall, a couple hundred boards from the very first batch of some keyboard models had pre-installed blank keycaps with the factory adjusting key and spring seating where needed. In addition to the factory needing an extra month or two to perform this labor by hand, thus delaying the entire container shipment, these keyboards still needed some adjustment of springs and keys after they arrived off the container ship to me, and certainly some other keys fell out of place while in the final leg of transit from me to the end user. The time to adjust these keys even with a preinstalled board was not sustainable when trying to mail out a couple thousand boards and it resulted in everyone’s boards taking longer, both for the factory to install them and for me to test and adjust each key and move through the backlog. For this reason I don’t think installing keycaps is likely to reduce the need for any user setup and maintenance. I don’t see a “maintenance-free” Model F as possible without additional compromises around cost and/or quality or a network of repair folks like IBM had when they rented the 4704 Model F keyboards to bank branches.